Resize Node
After launching a node, you can scale up or scale down its resource usage based on your preference.
Please keep in mind that the disk resize option can only be requested once every 6 hours. After resizing, you must wait for the previous 6-hour cycle to complete before resizing the disk again.
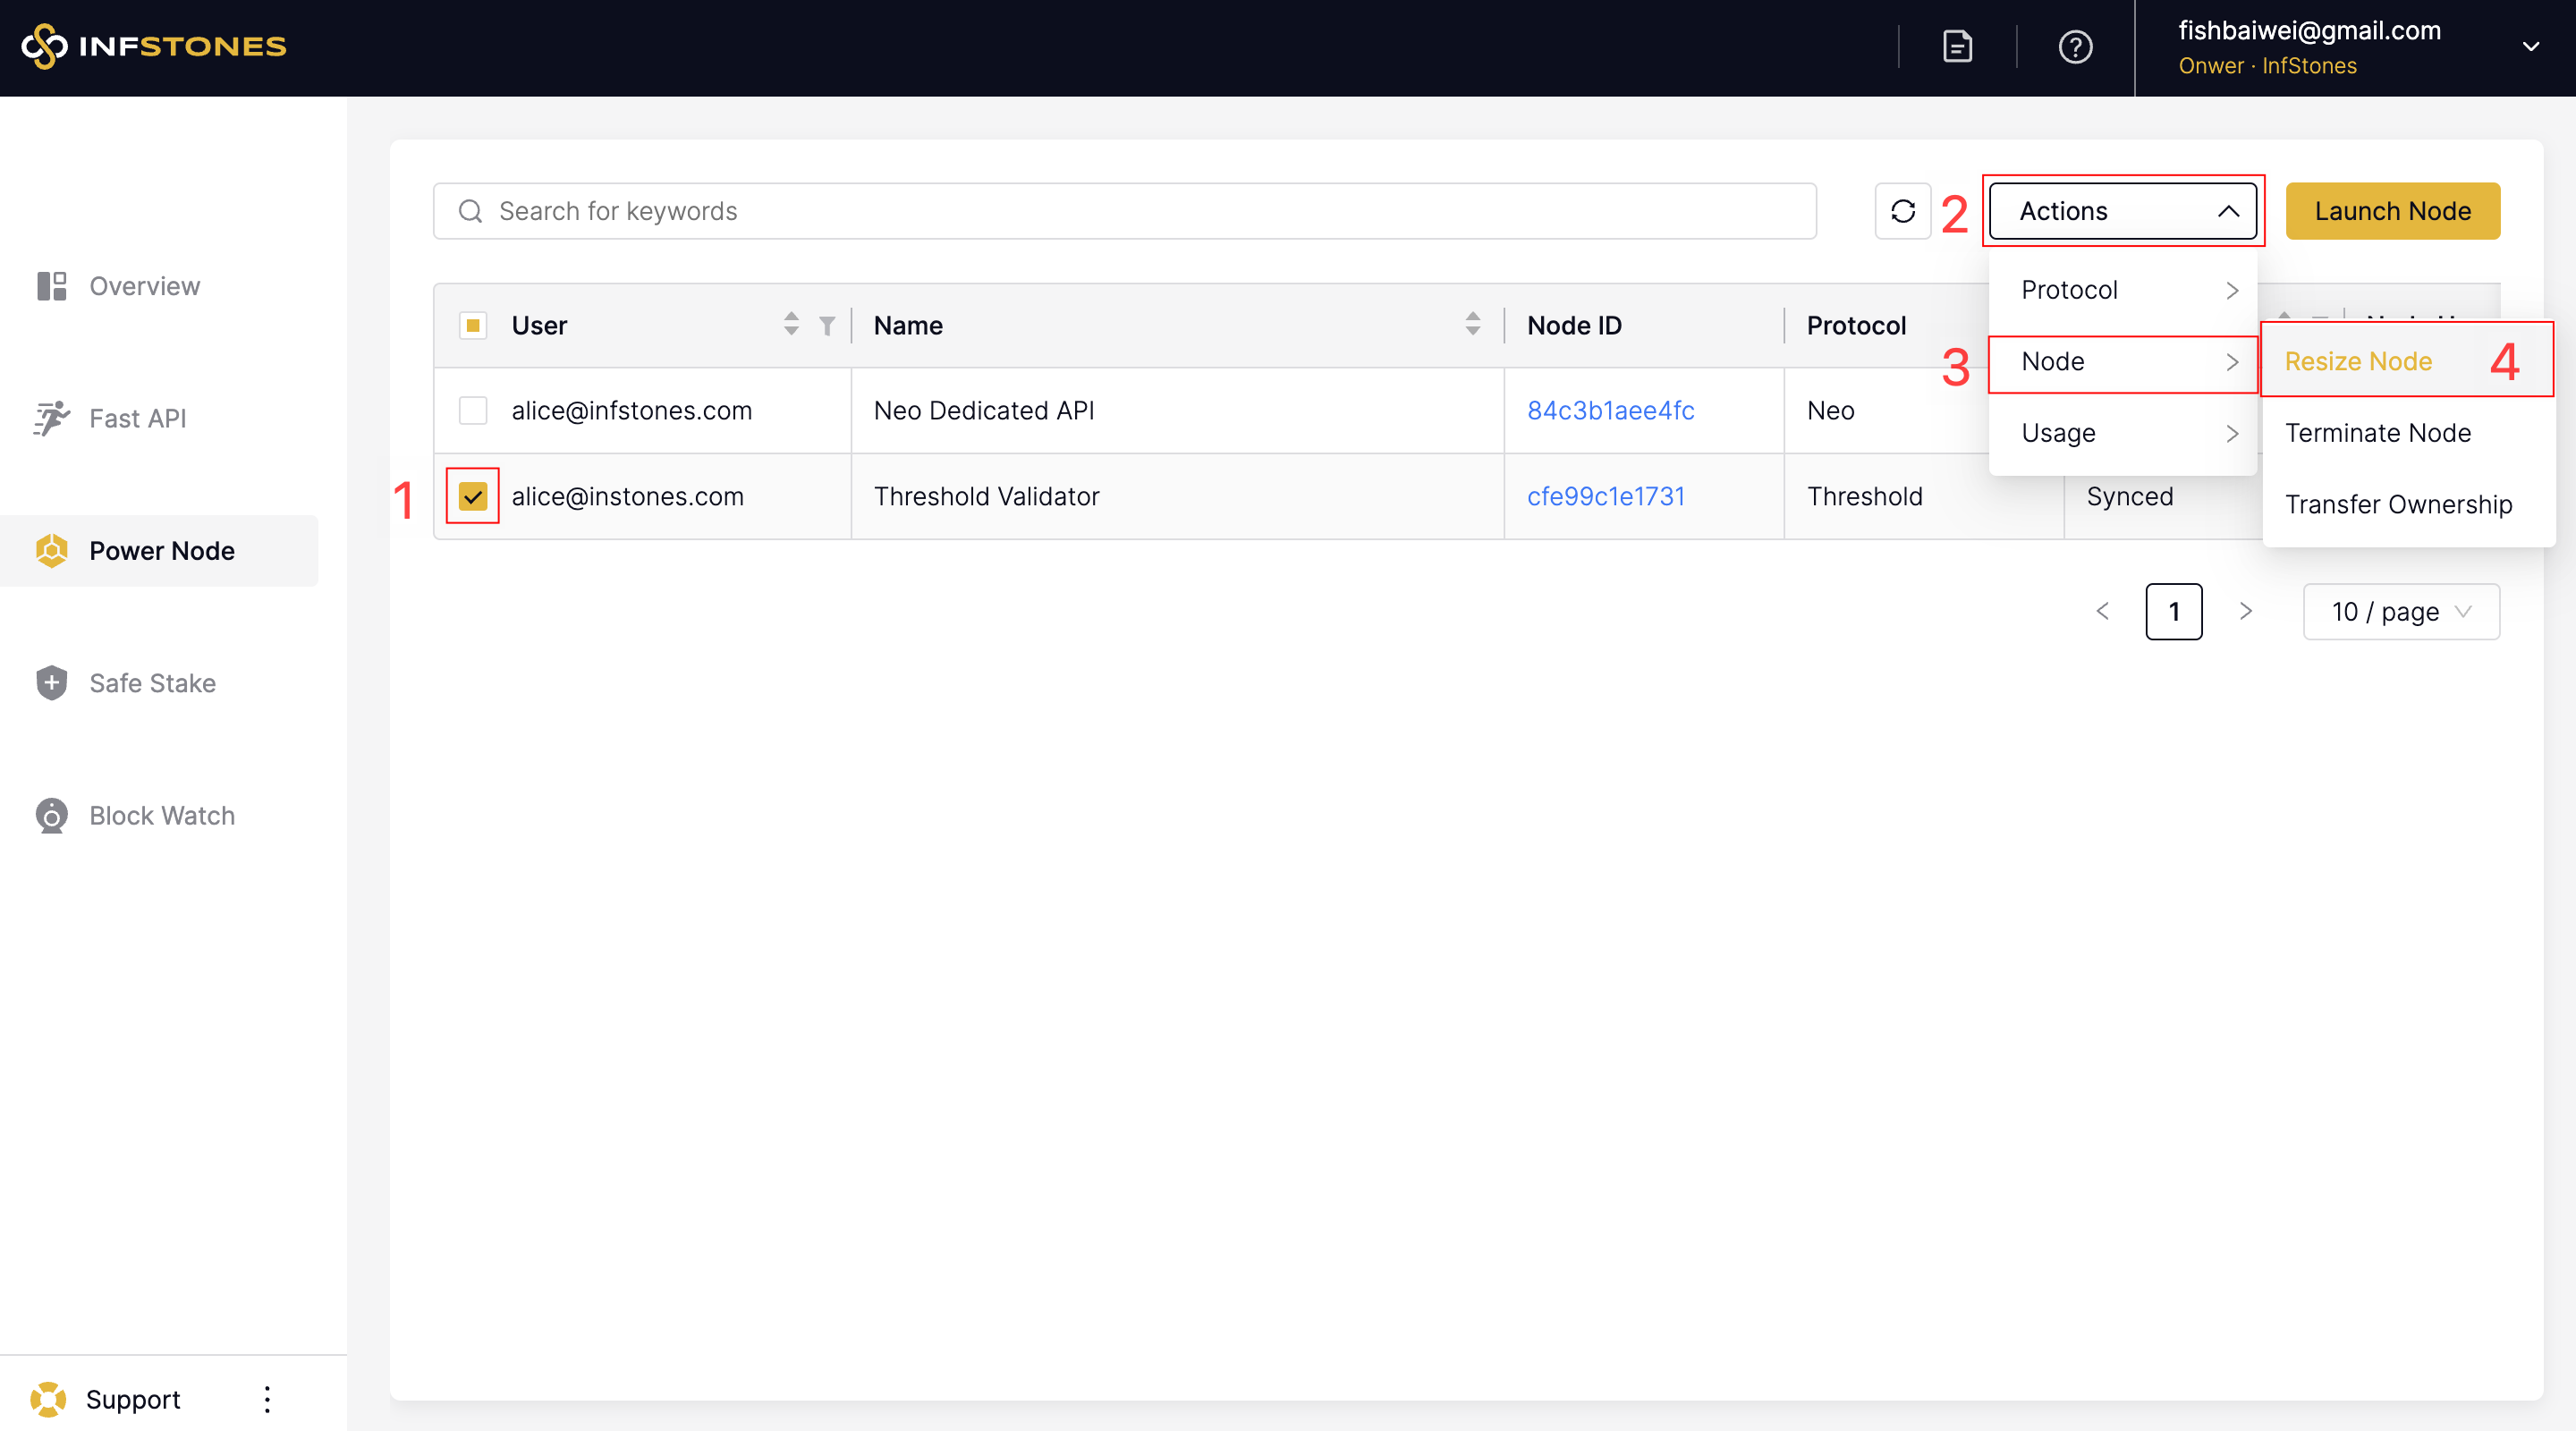
1 Select the Node
To resize a node, first, select it from your Nodes List page by checking the box next to the node name, and then click the Actions -> Node -> Resize Node button, as shown below.
2 Select New Configuration
The current resource configuration of your node will be displayed in a pop-up window as shown in the image below, and you can edit the CPU, Memory, and Disk configuration values by toggling the dropdown buttons and selecting new values.
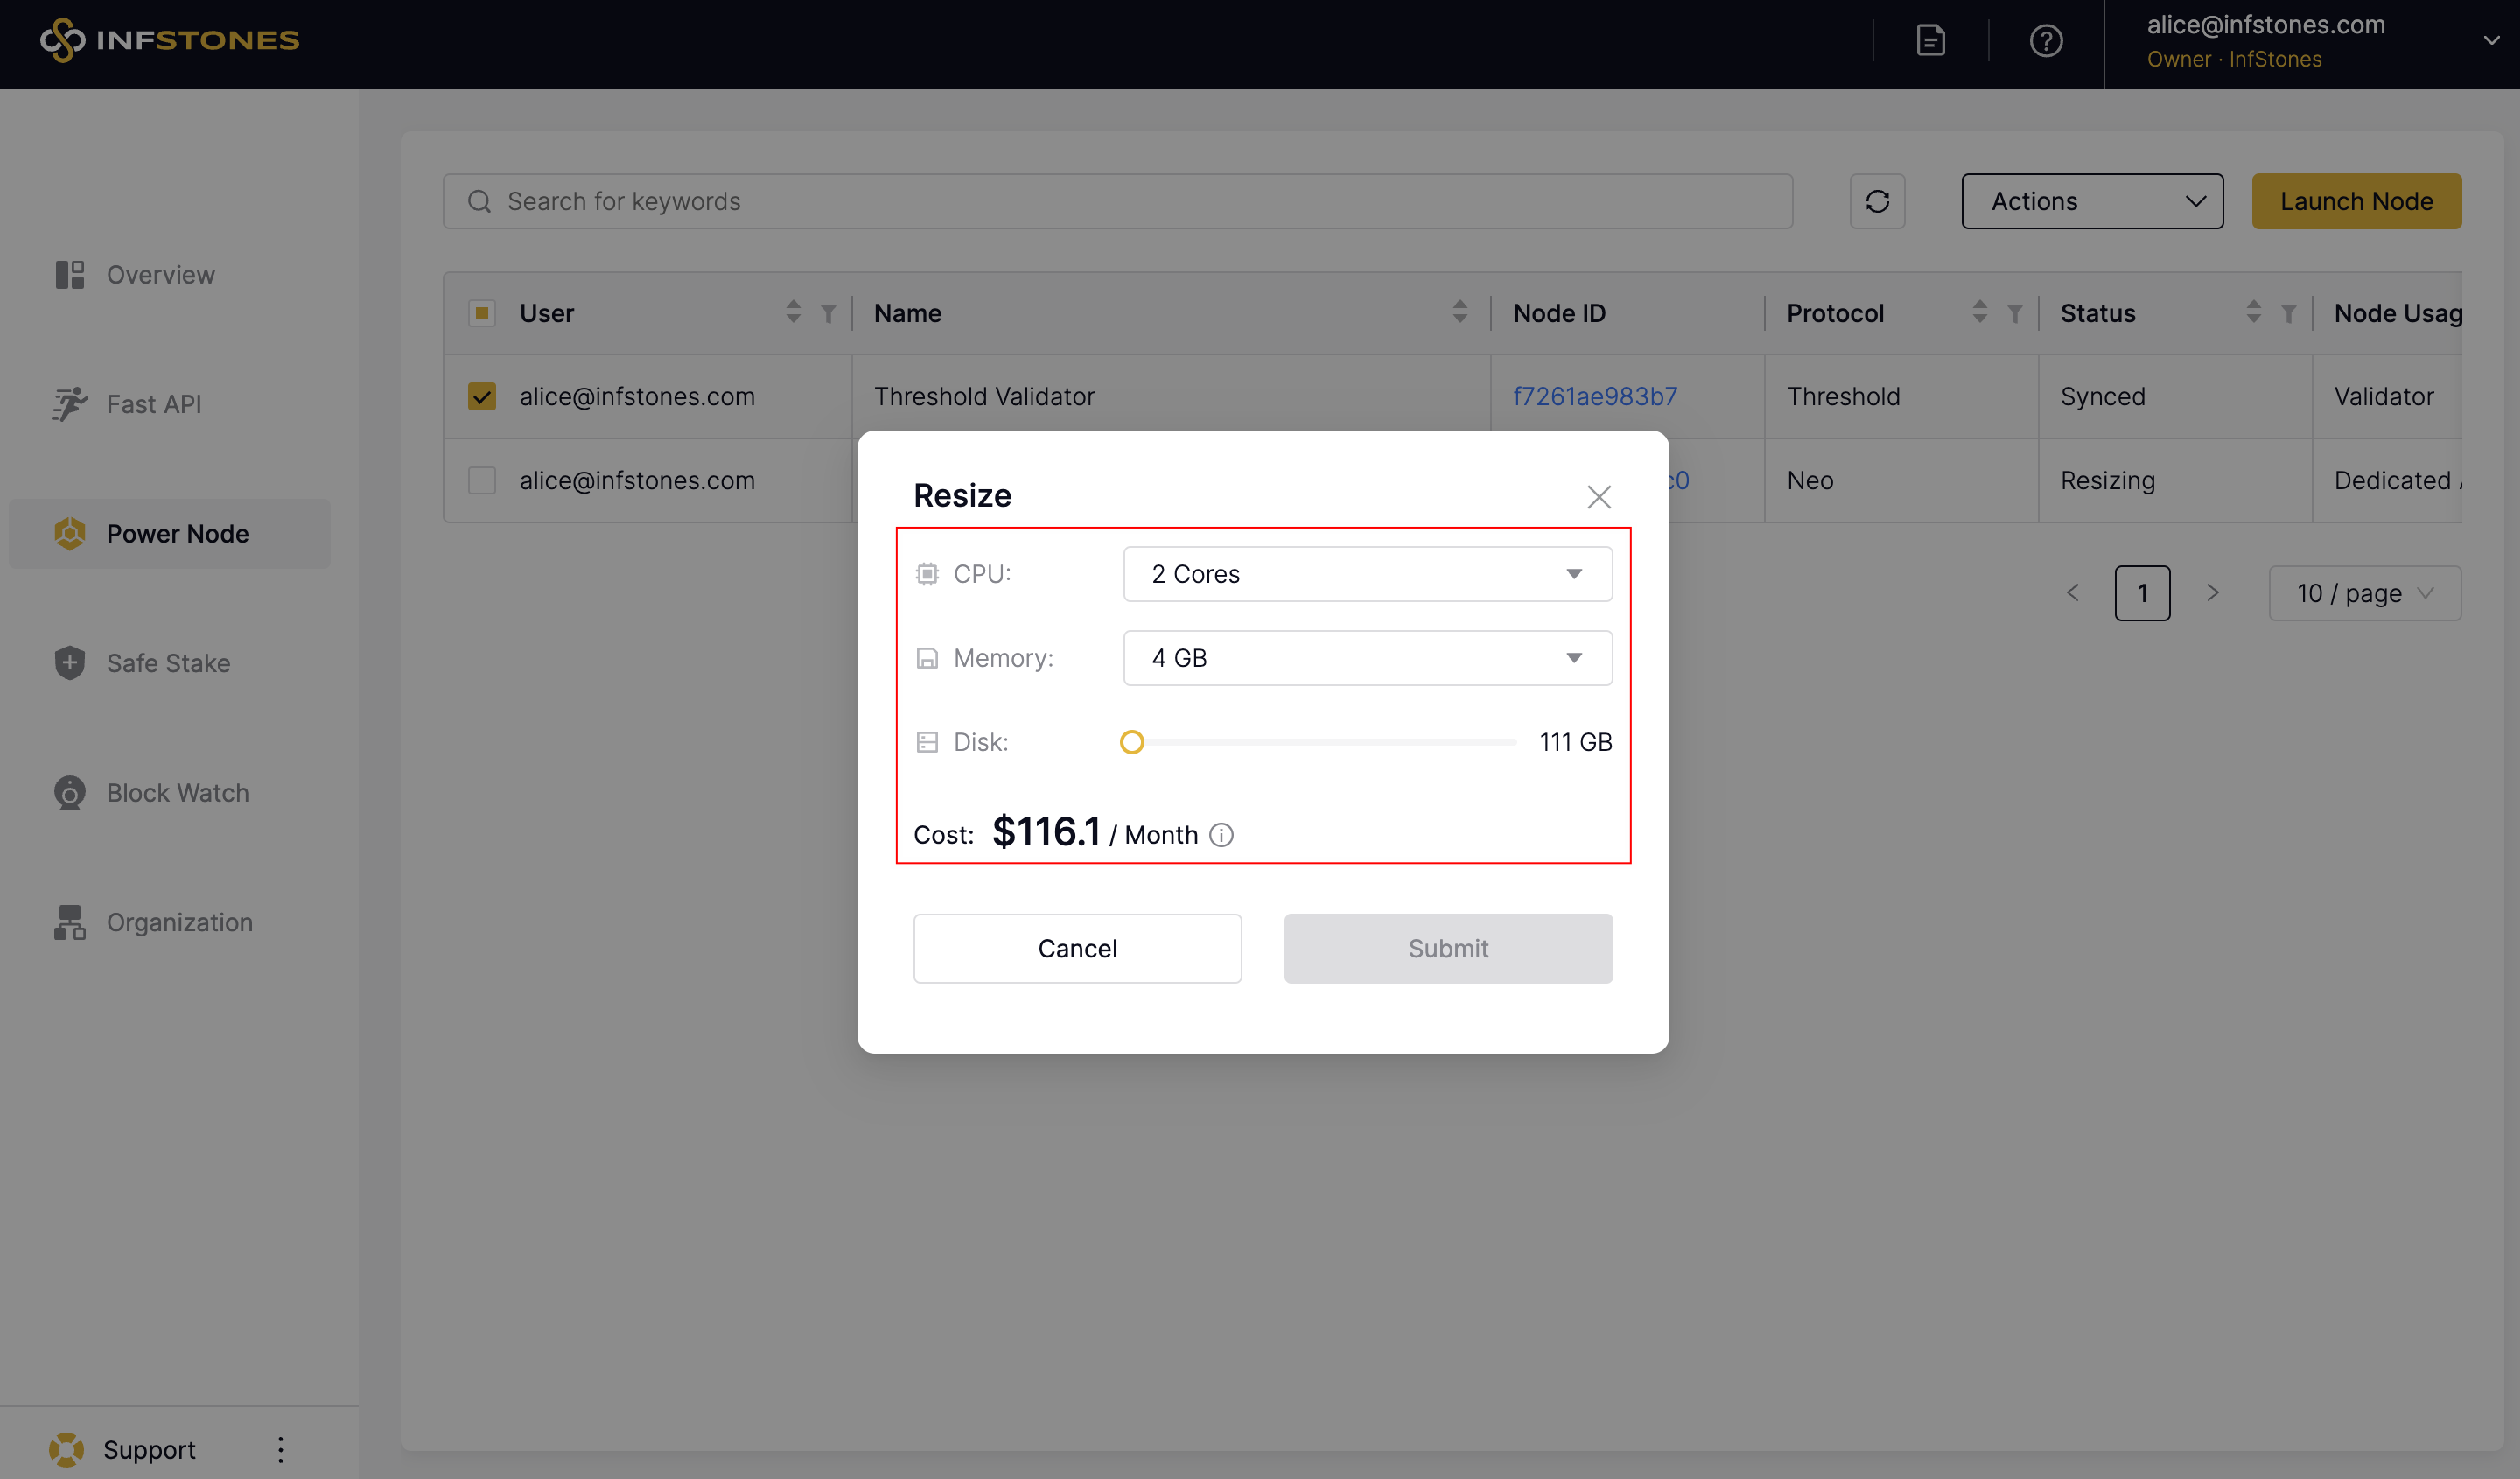
You can either scale up or down the configuration. After you choose a new CPU/ Memory/Disk size, it will display the price of the new configuration. You will need to pay the full monthly cost of the new configuration.
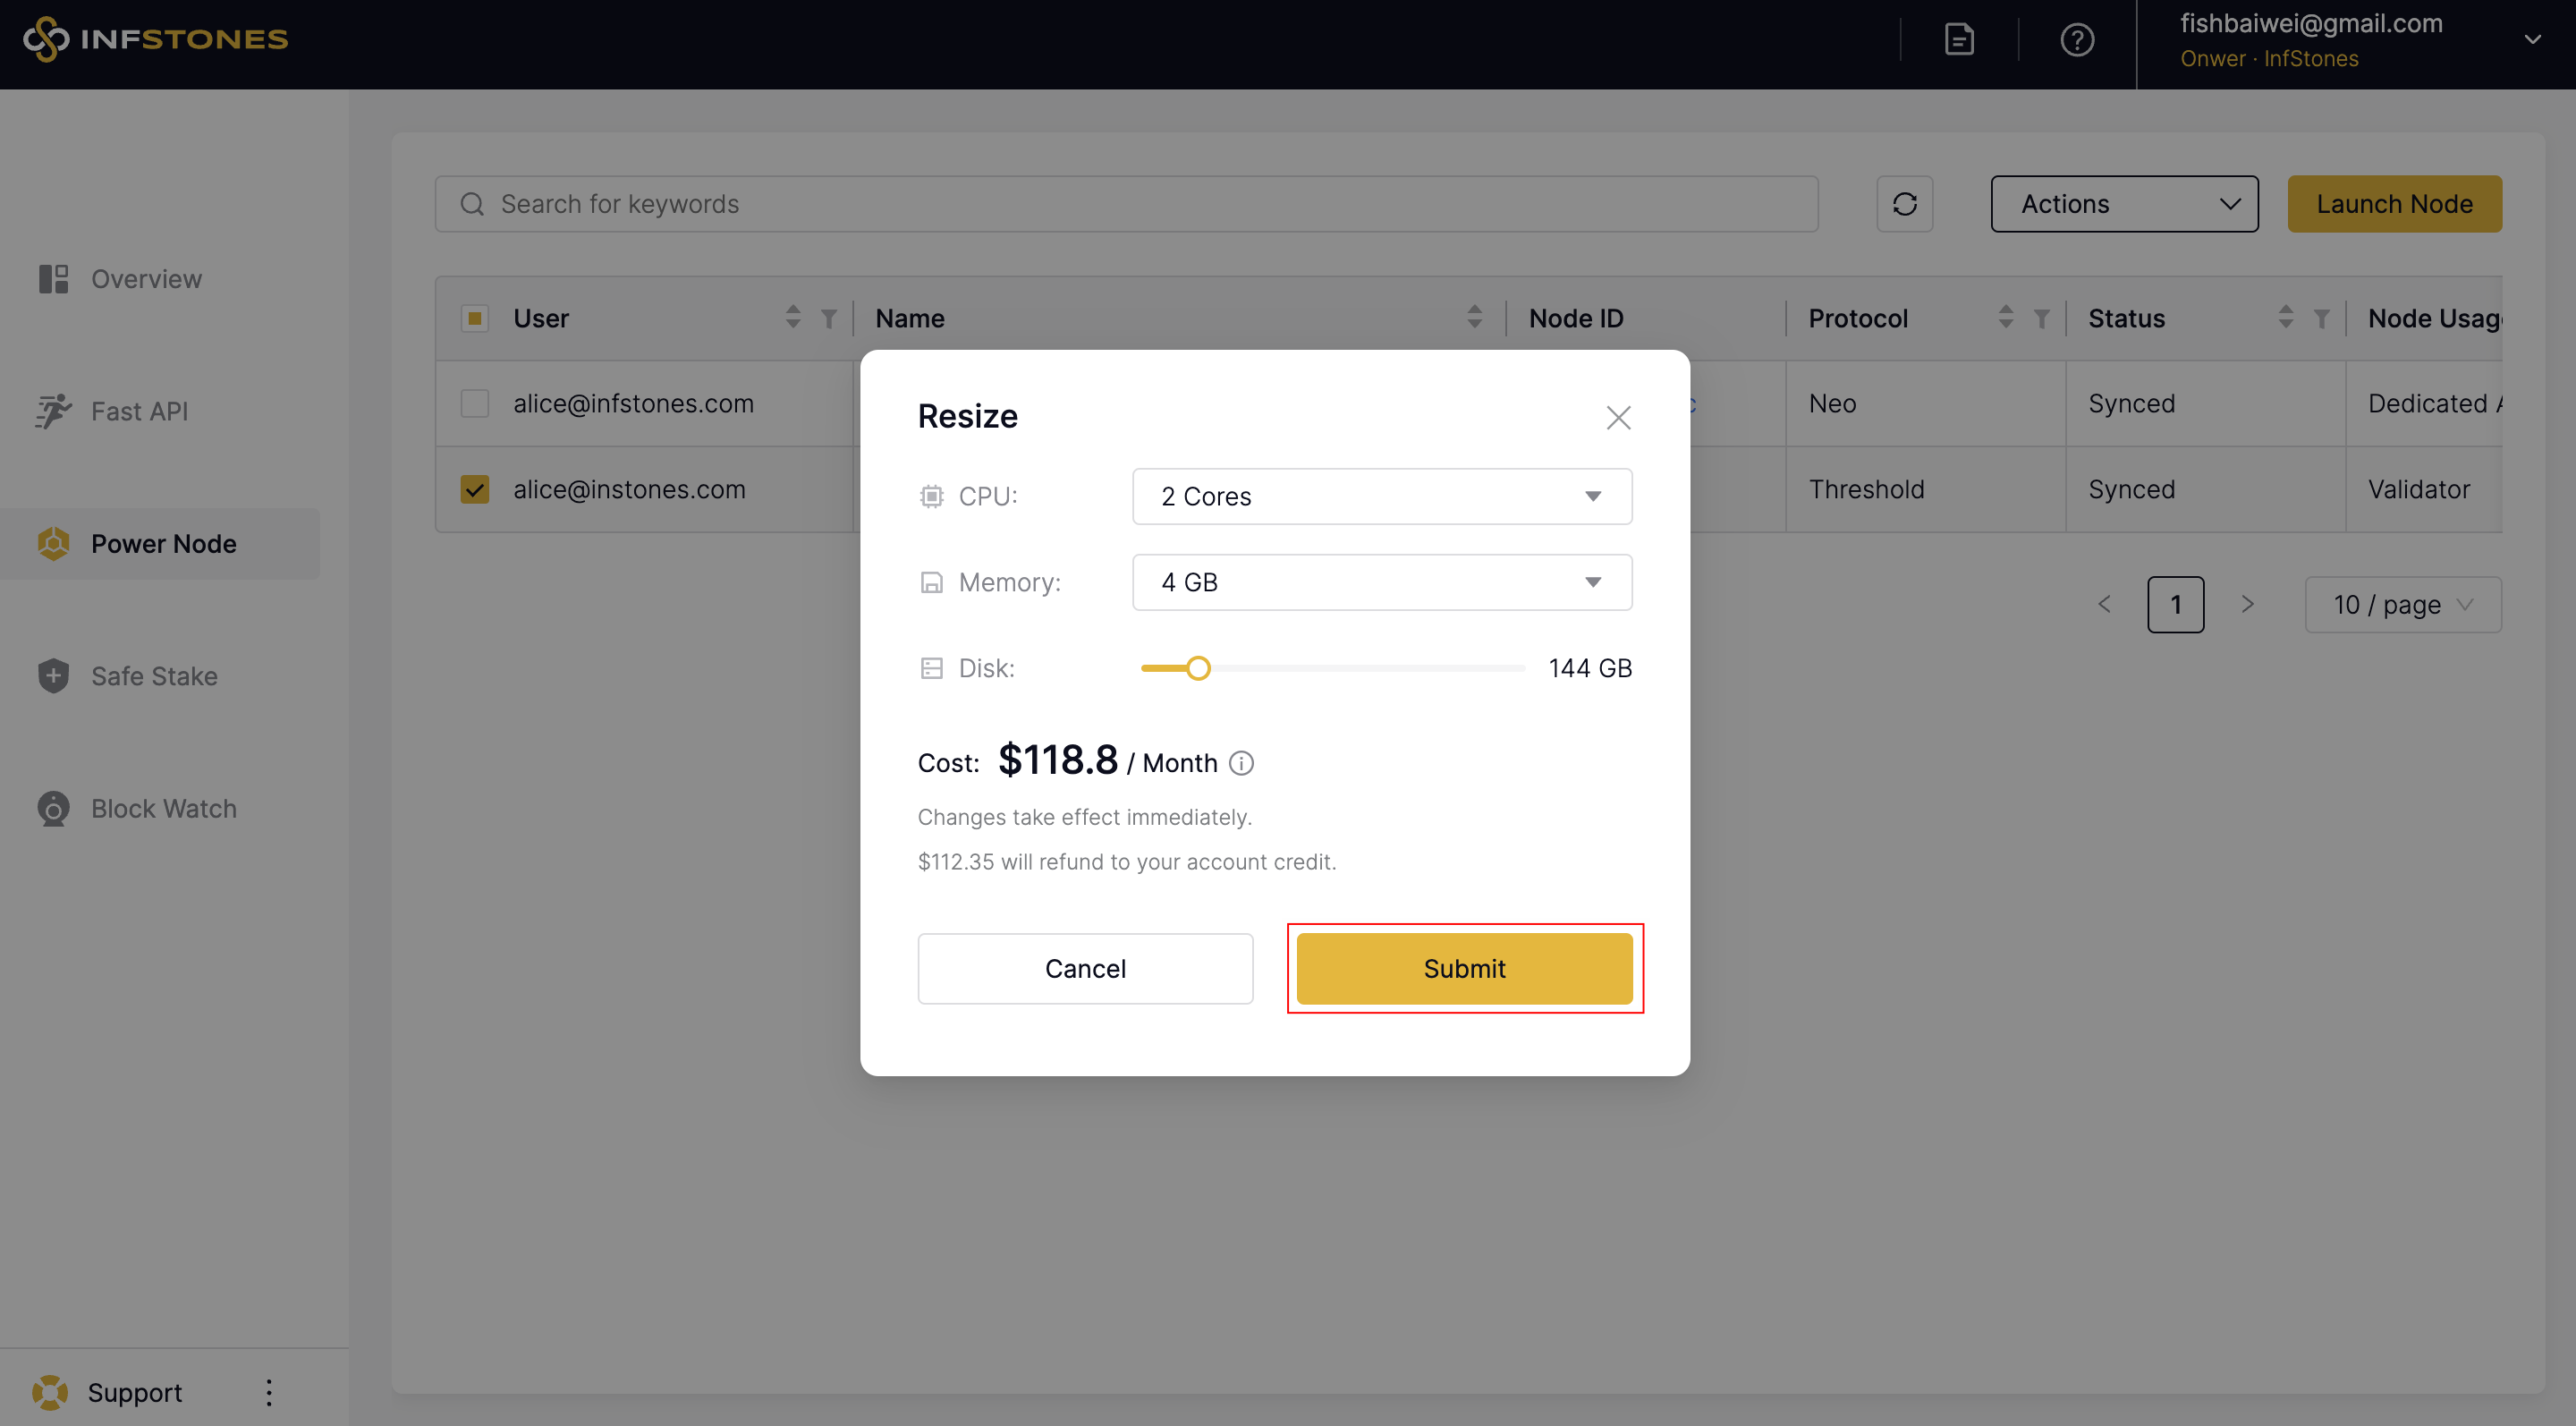
The unused amount of your old order will be calculated and refunded to your account credit once the resize is completed. This credit can then be applied to the registration of new services on the platform.
Once you've selected your new preferred configuration, click the Submit button to continue.
3 Complete the Payment
Choose your payment method and click Submit to complete resizing the node.
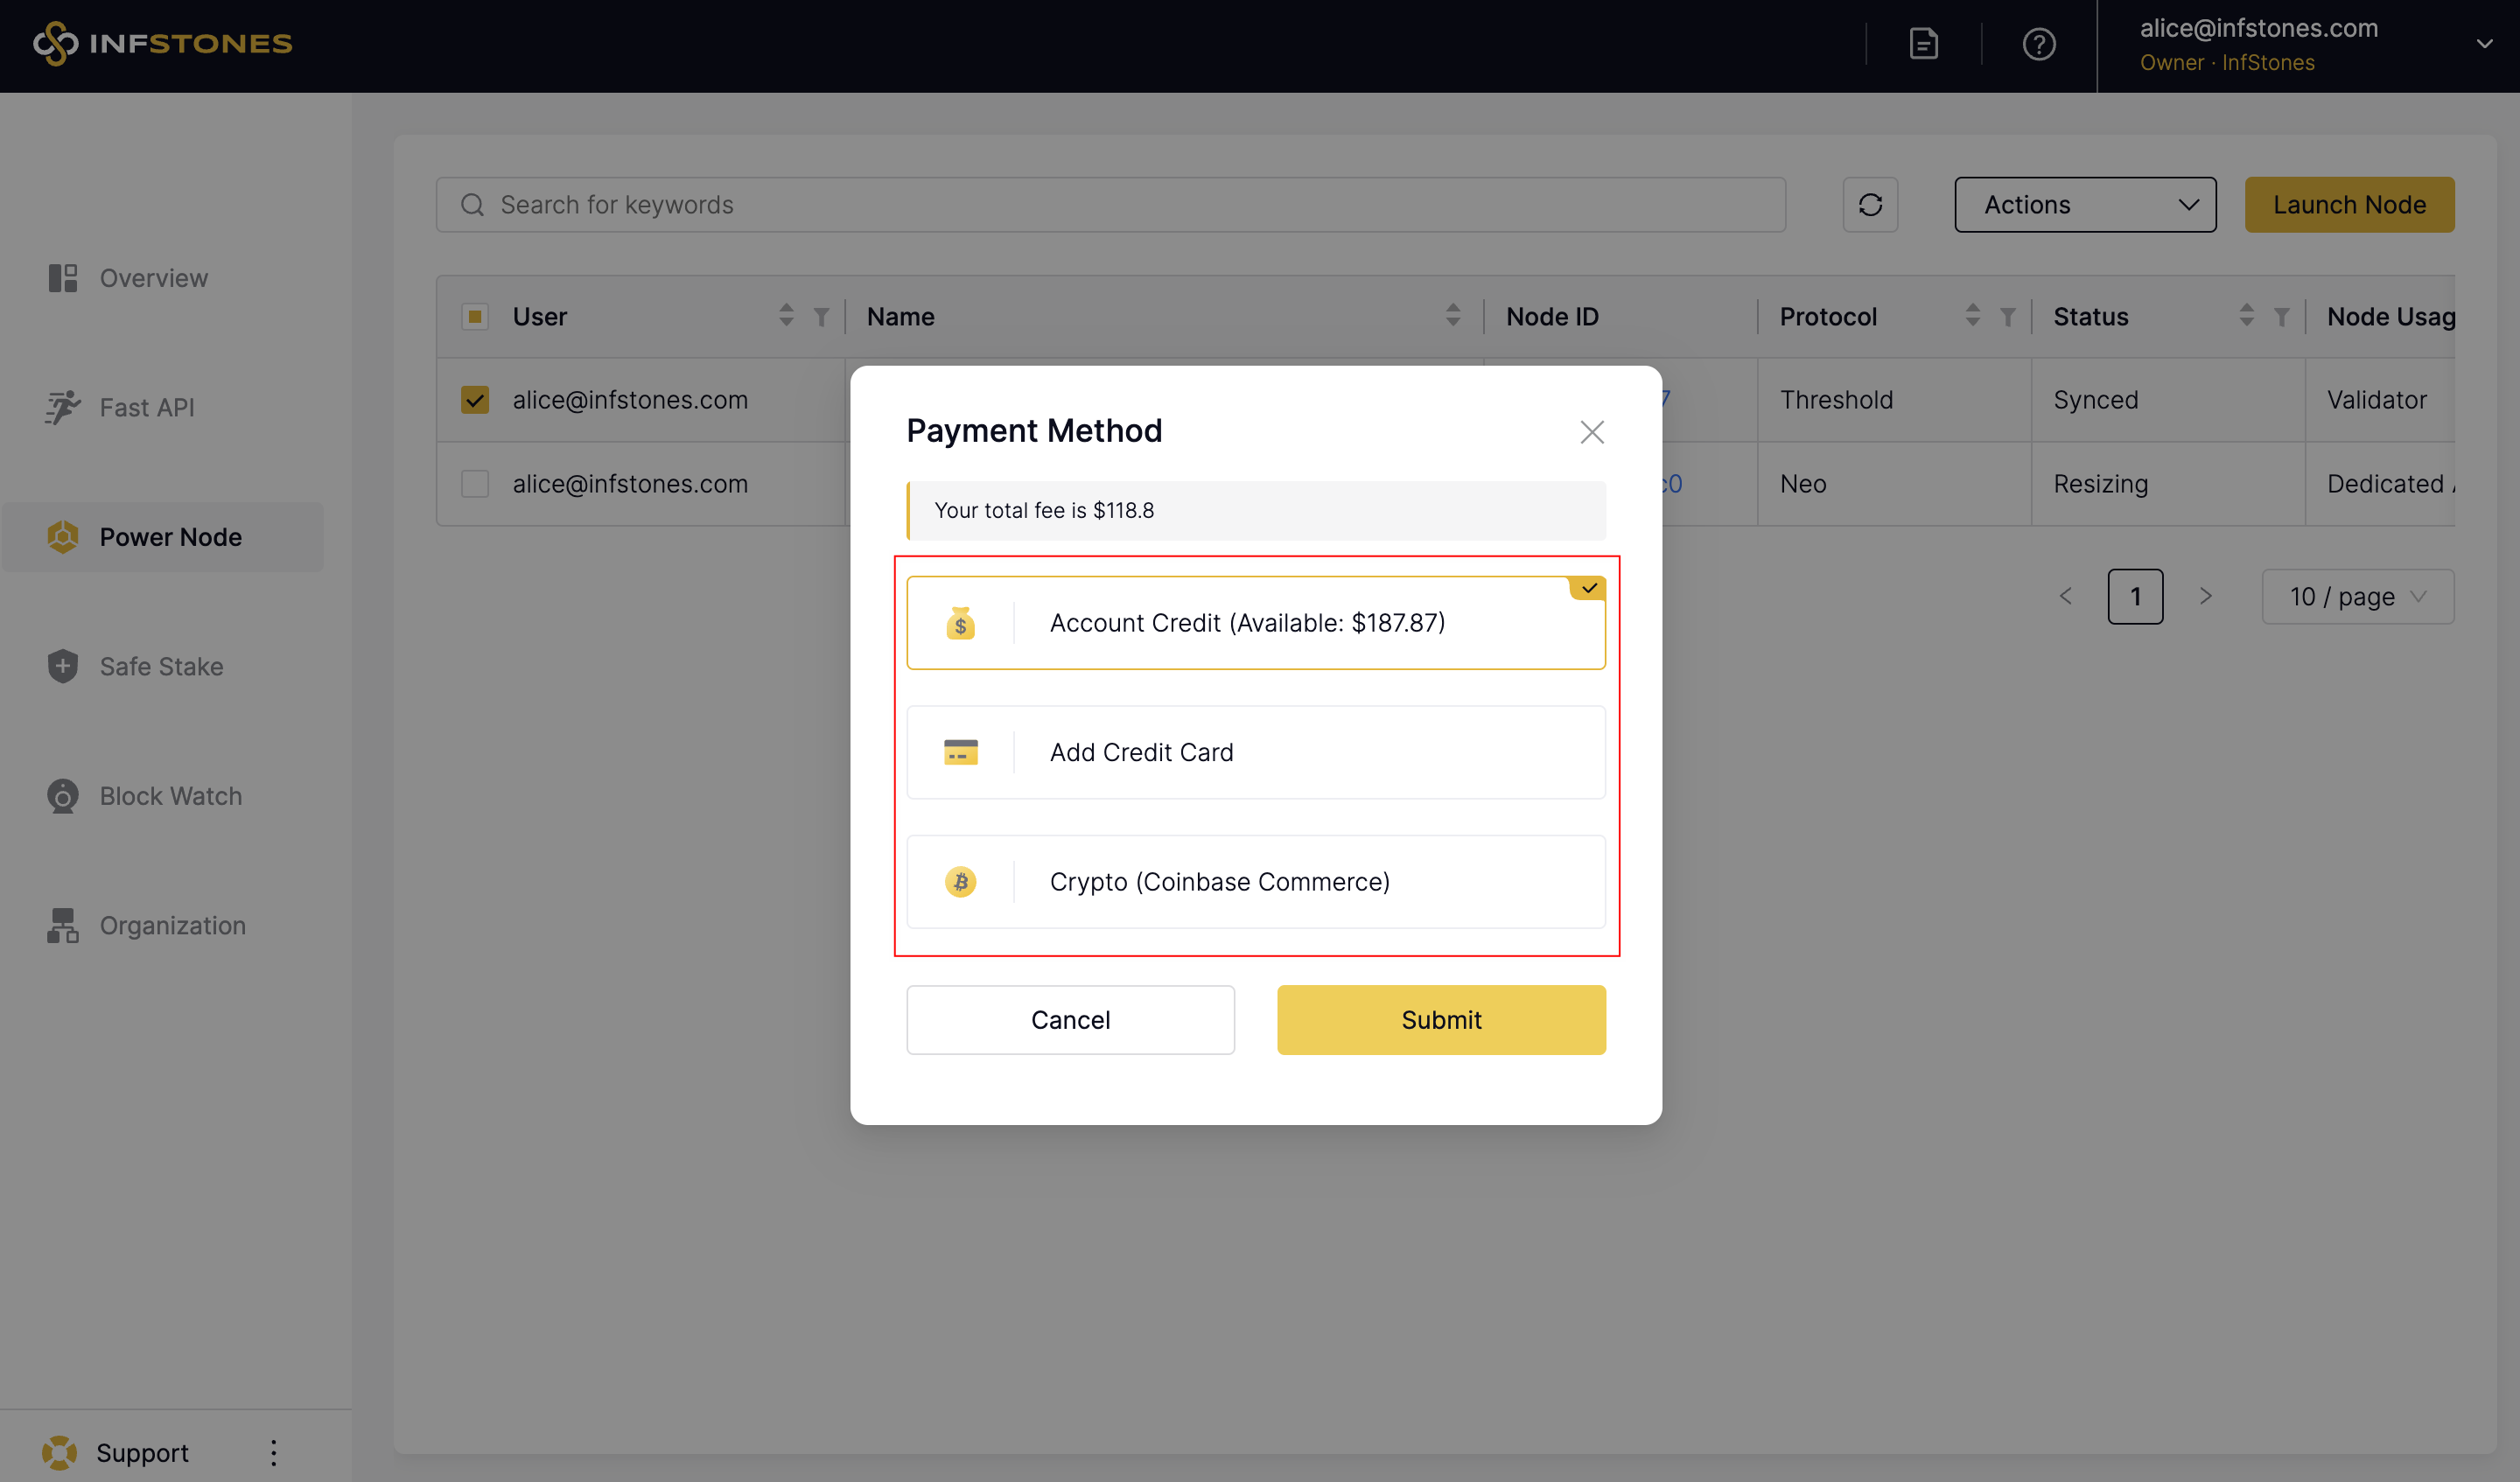
Once the process is completed, you will be redirected to your node list page and get a "Resized successfully initiated" notification. The node's status should also have changed to resizing.
Updated 9 months ago