Invite Users into Organization
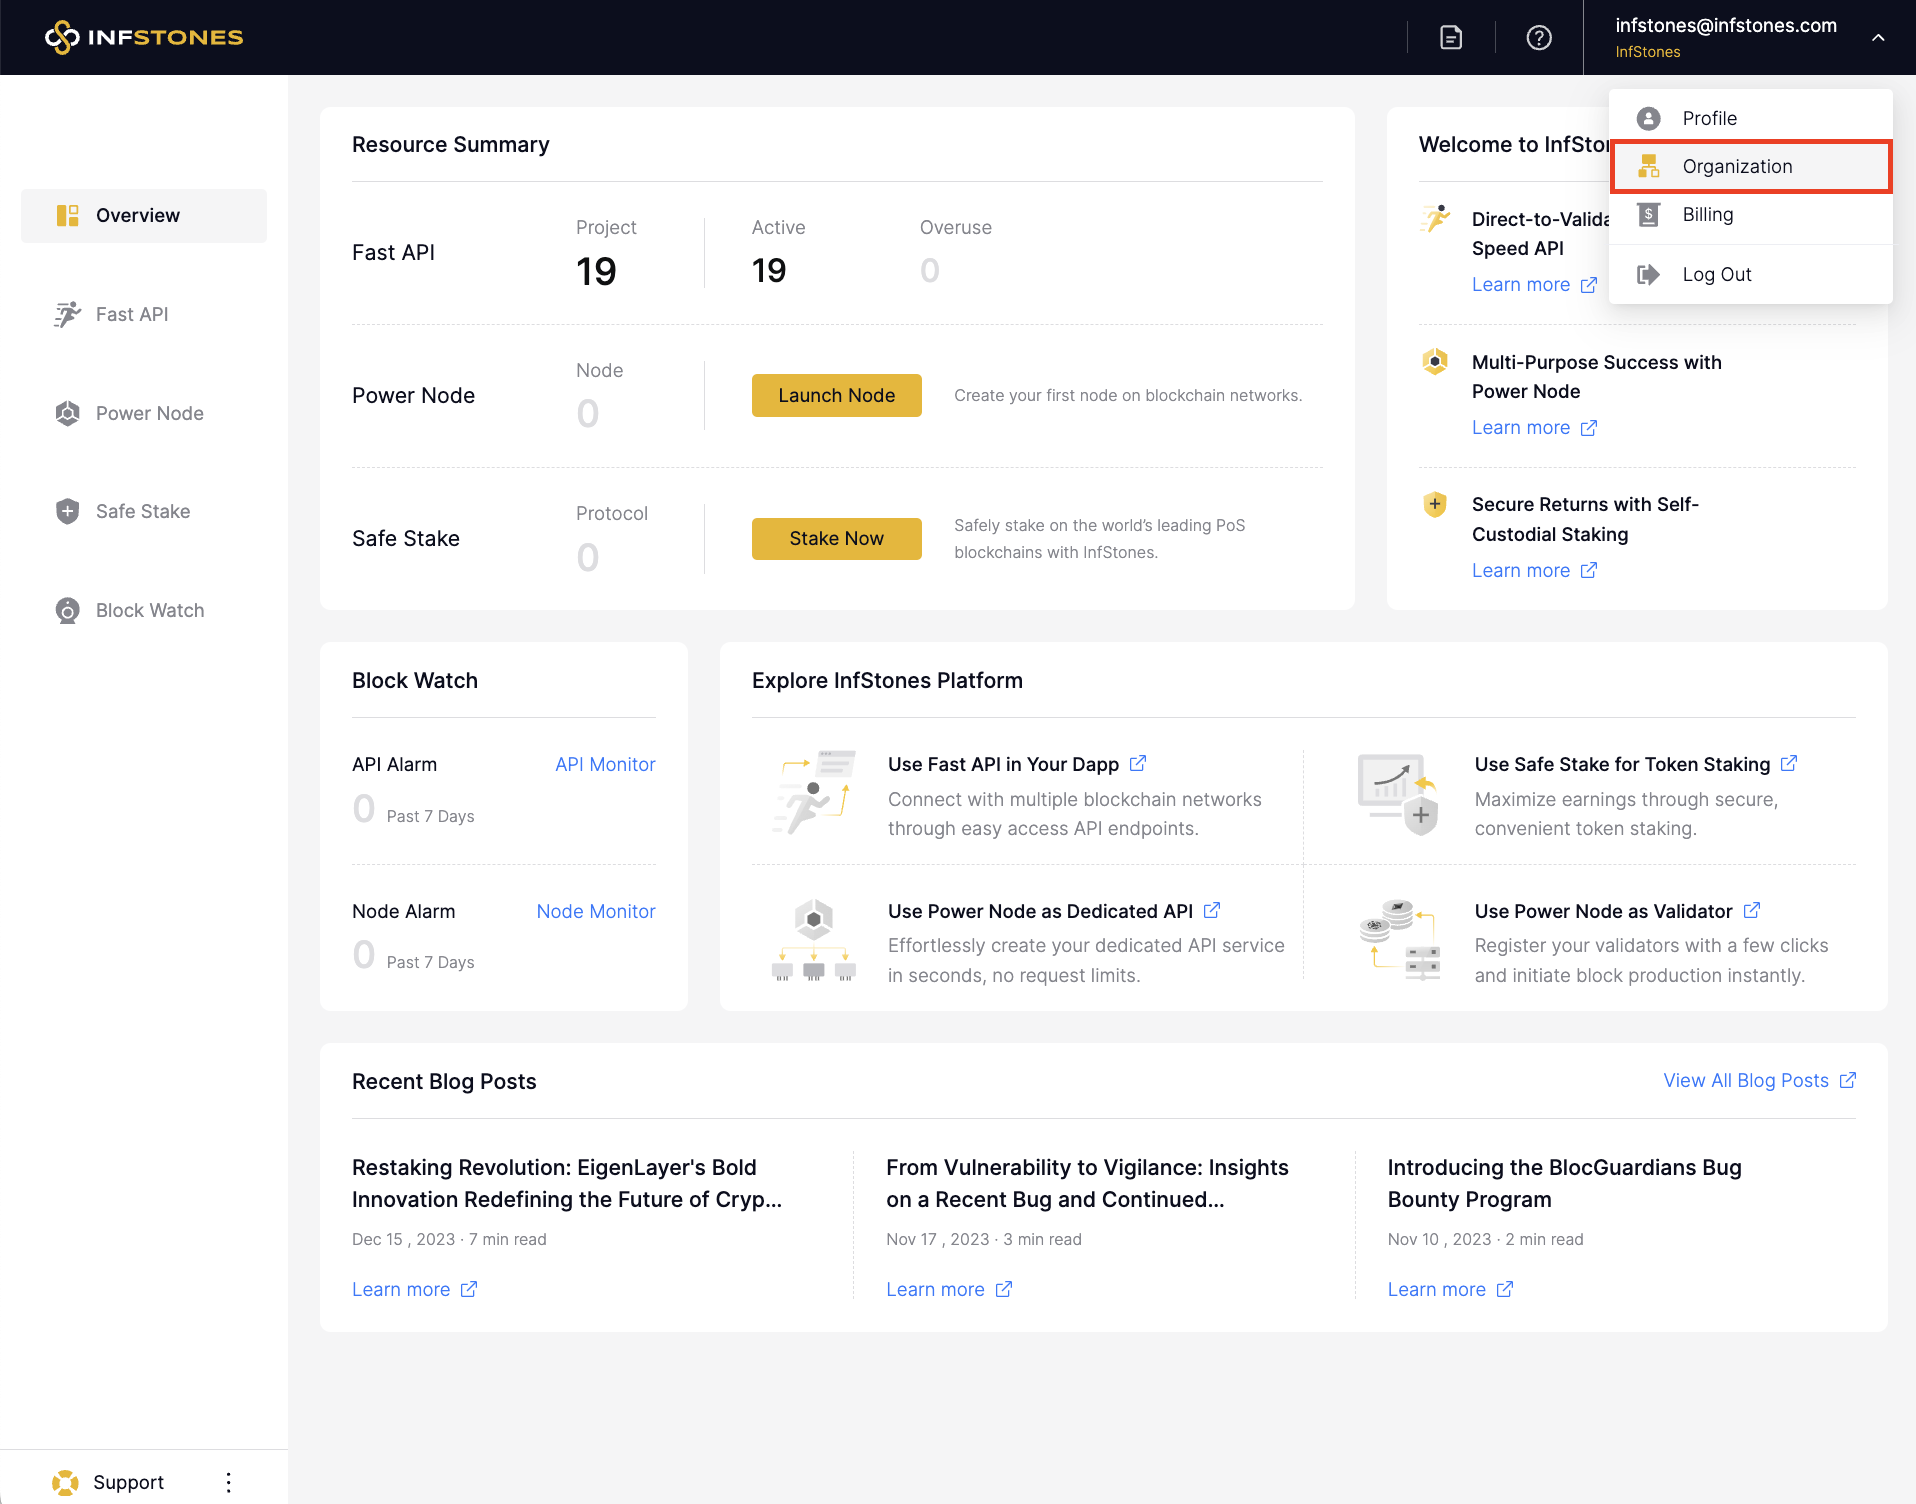
If you want to make some changes in the organization, once you are logged in to your InfStones dashboard, click the dropdown button on the top-right corner and select the Organization.
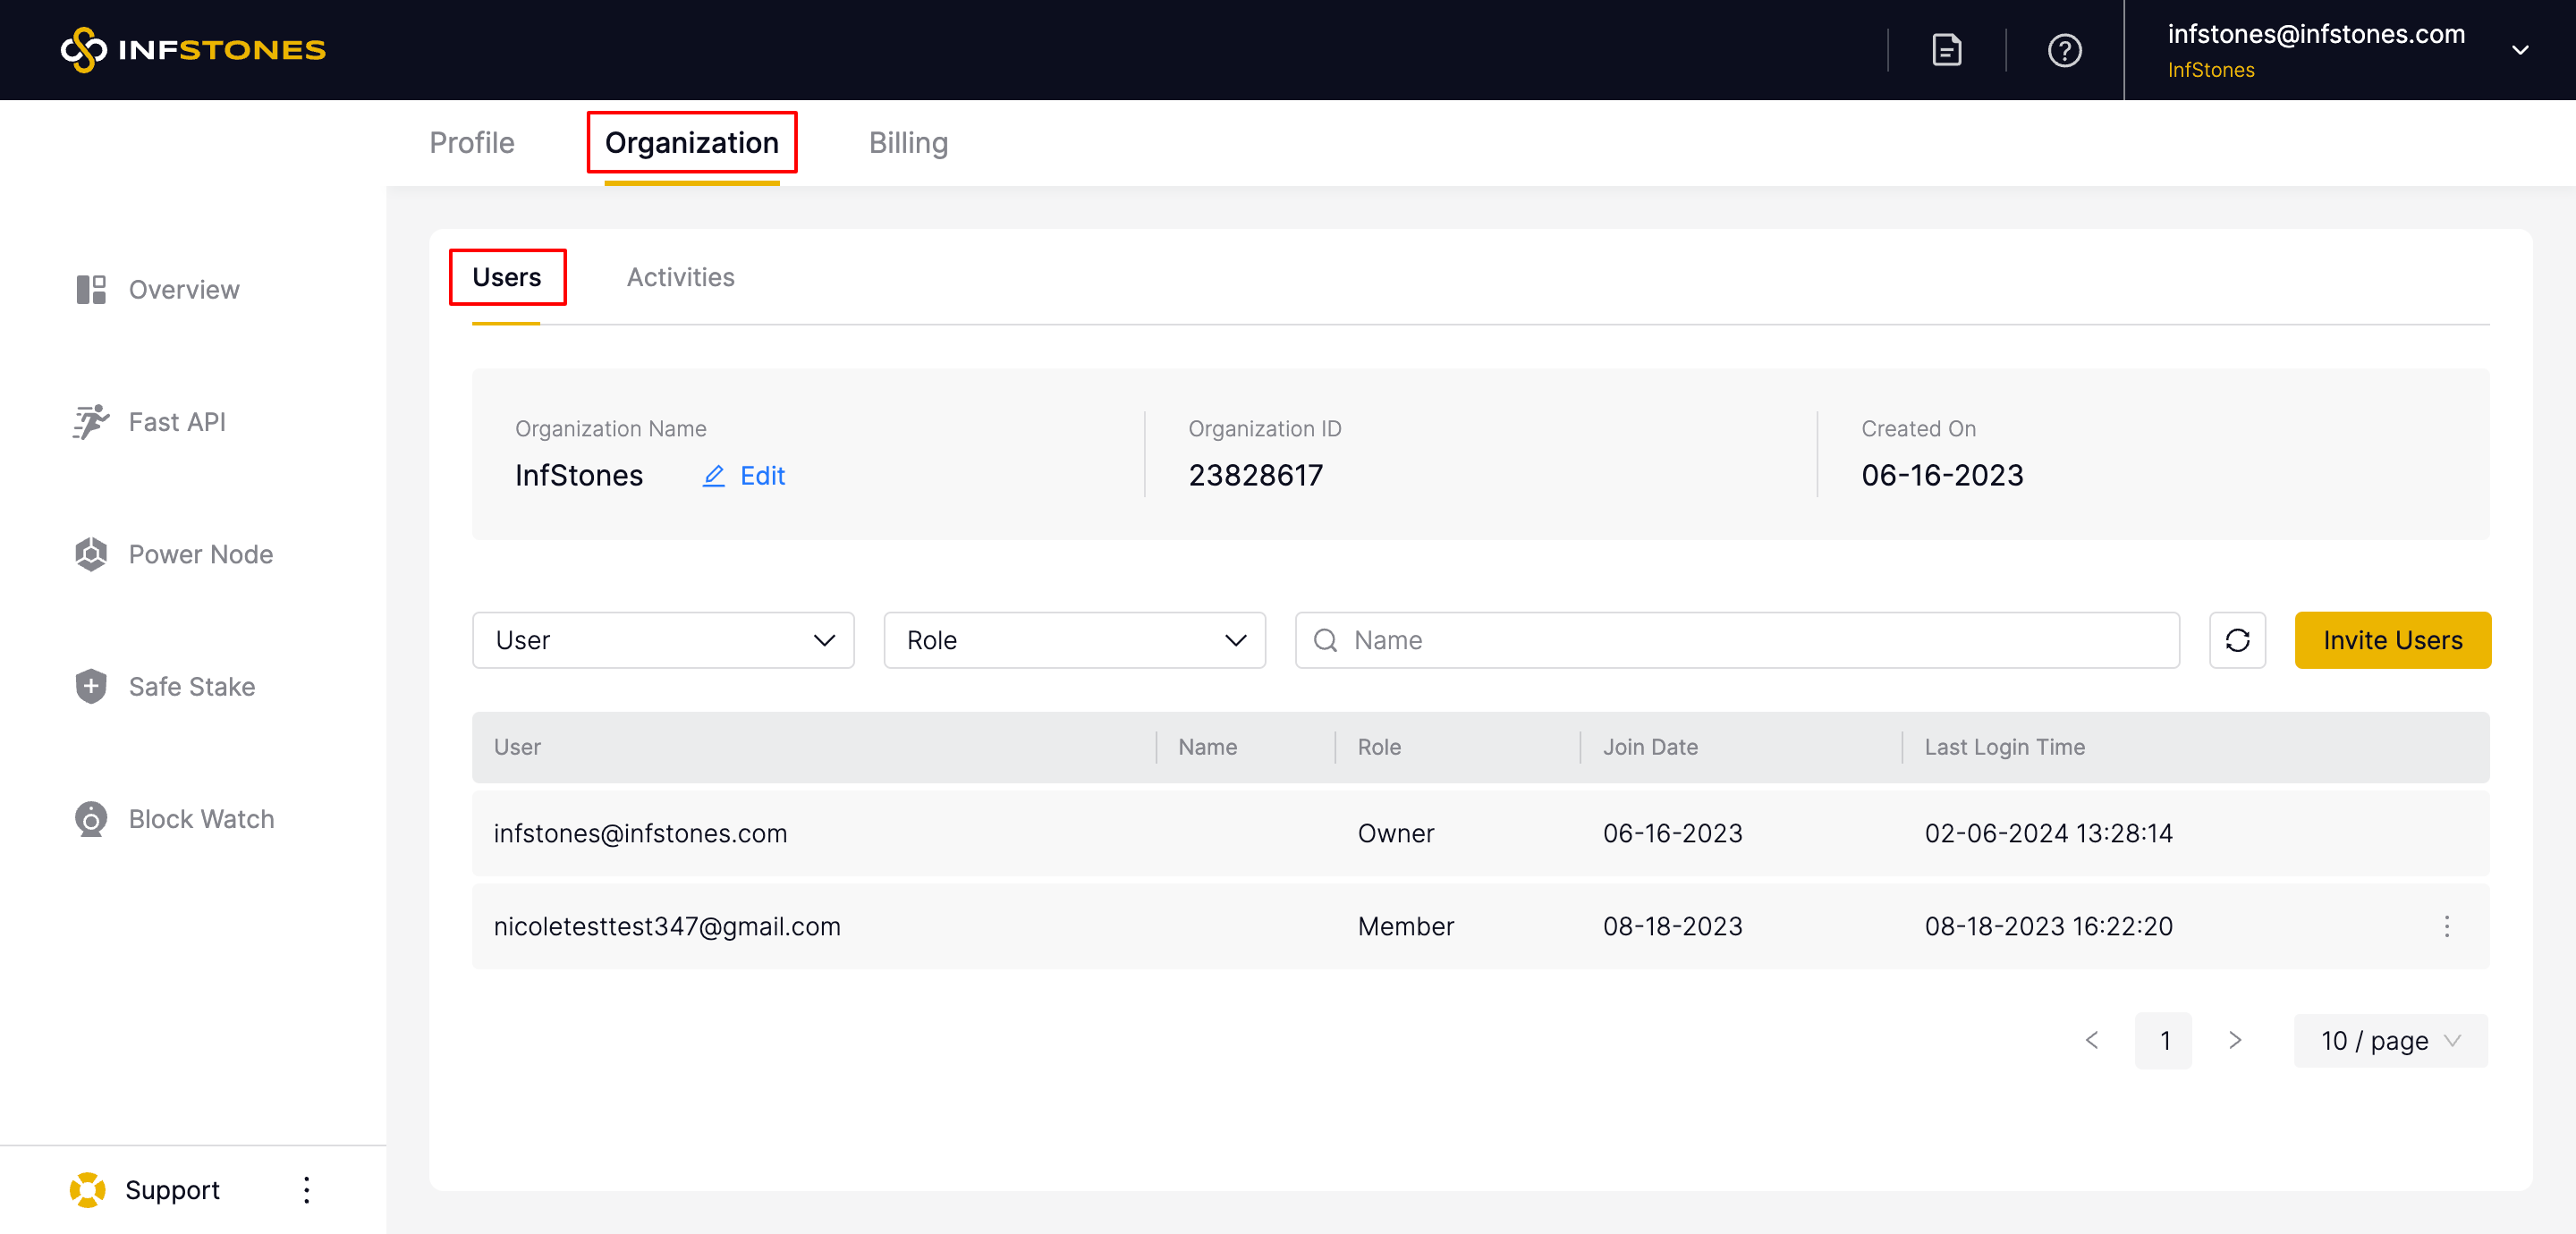
1 Manage Users
In the Userssection which underOrganization tab, you can see all invited users' names, roles, email addresses, the date they joined the organization, and their last login time. You can also find any user or role by selecting them from the drop-down boxes or using the provided search box.
1.1 Invite New Users
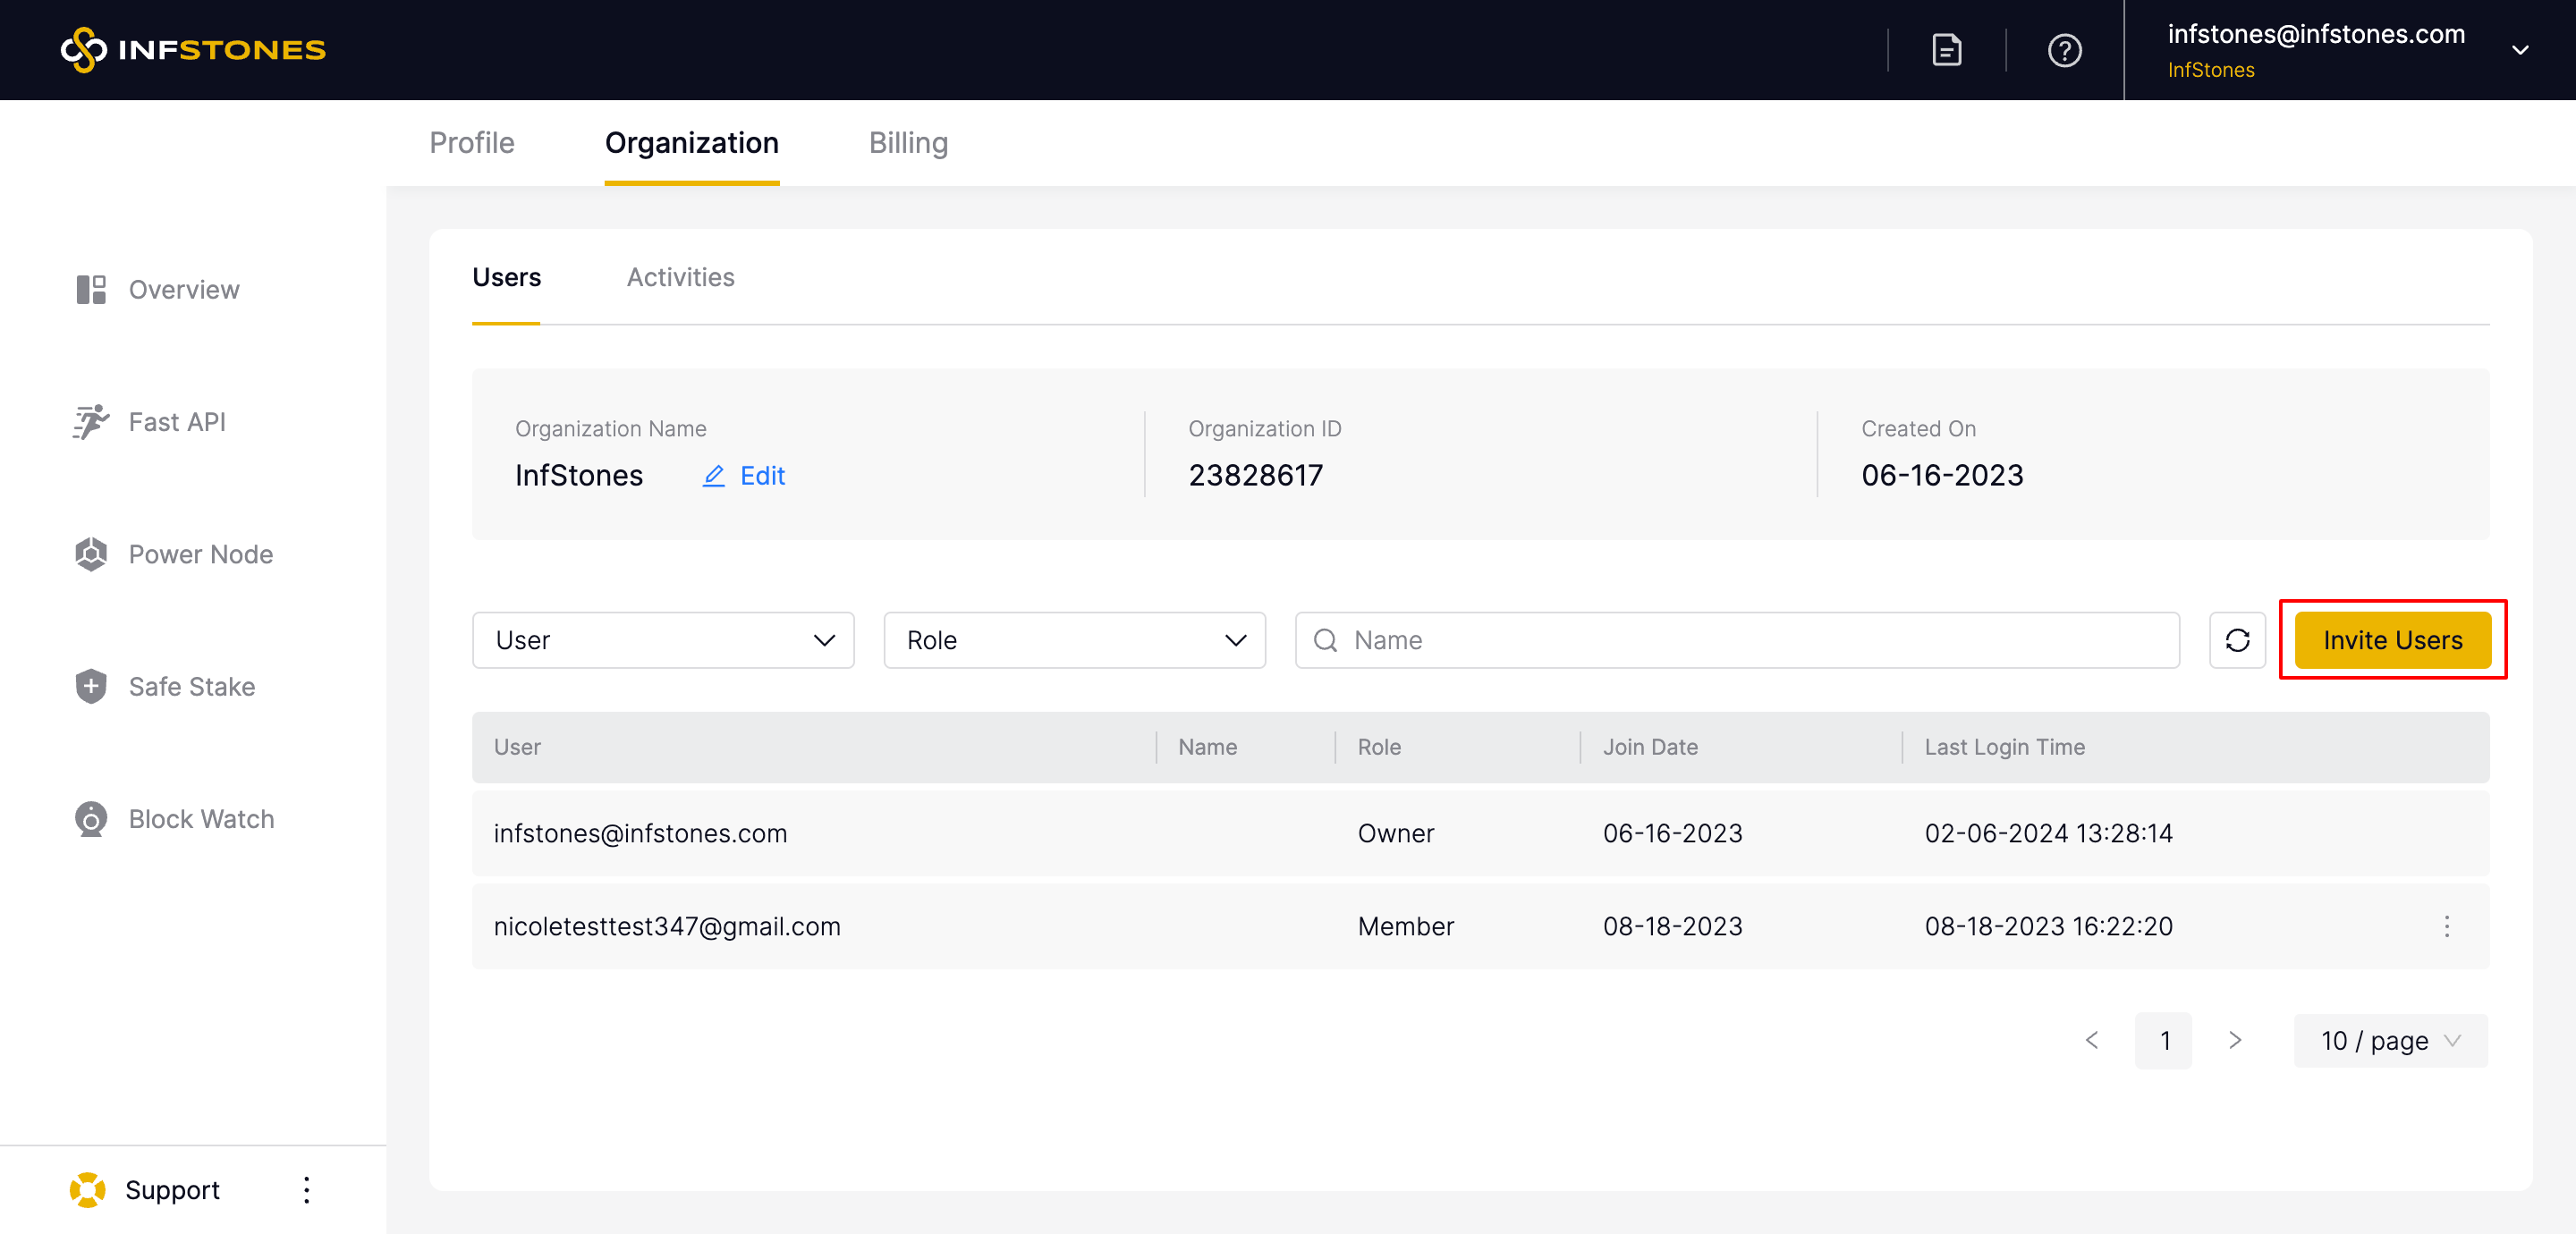
To invite new users, click the Invite Users button.
Next, you choose roles for the new user, enter their email address, and click the Add button.
Please keep in mind that you can only add unregistered email addresses.
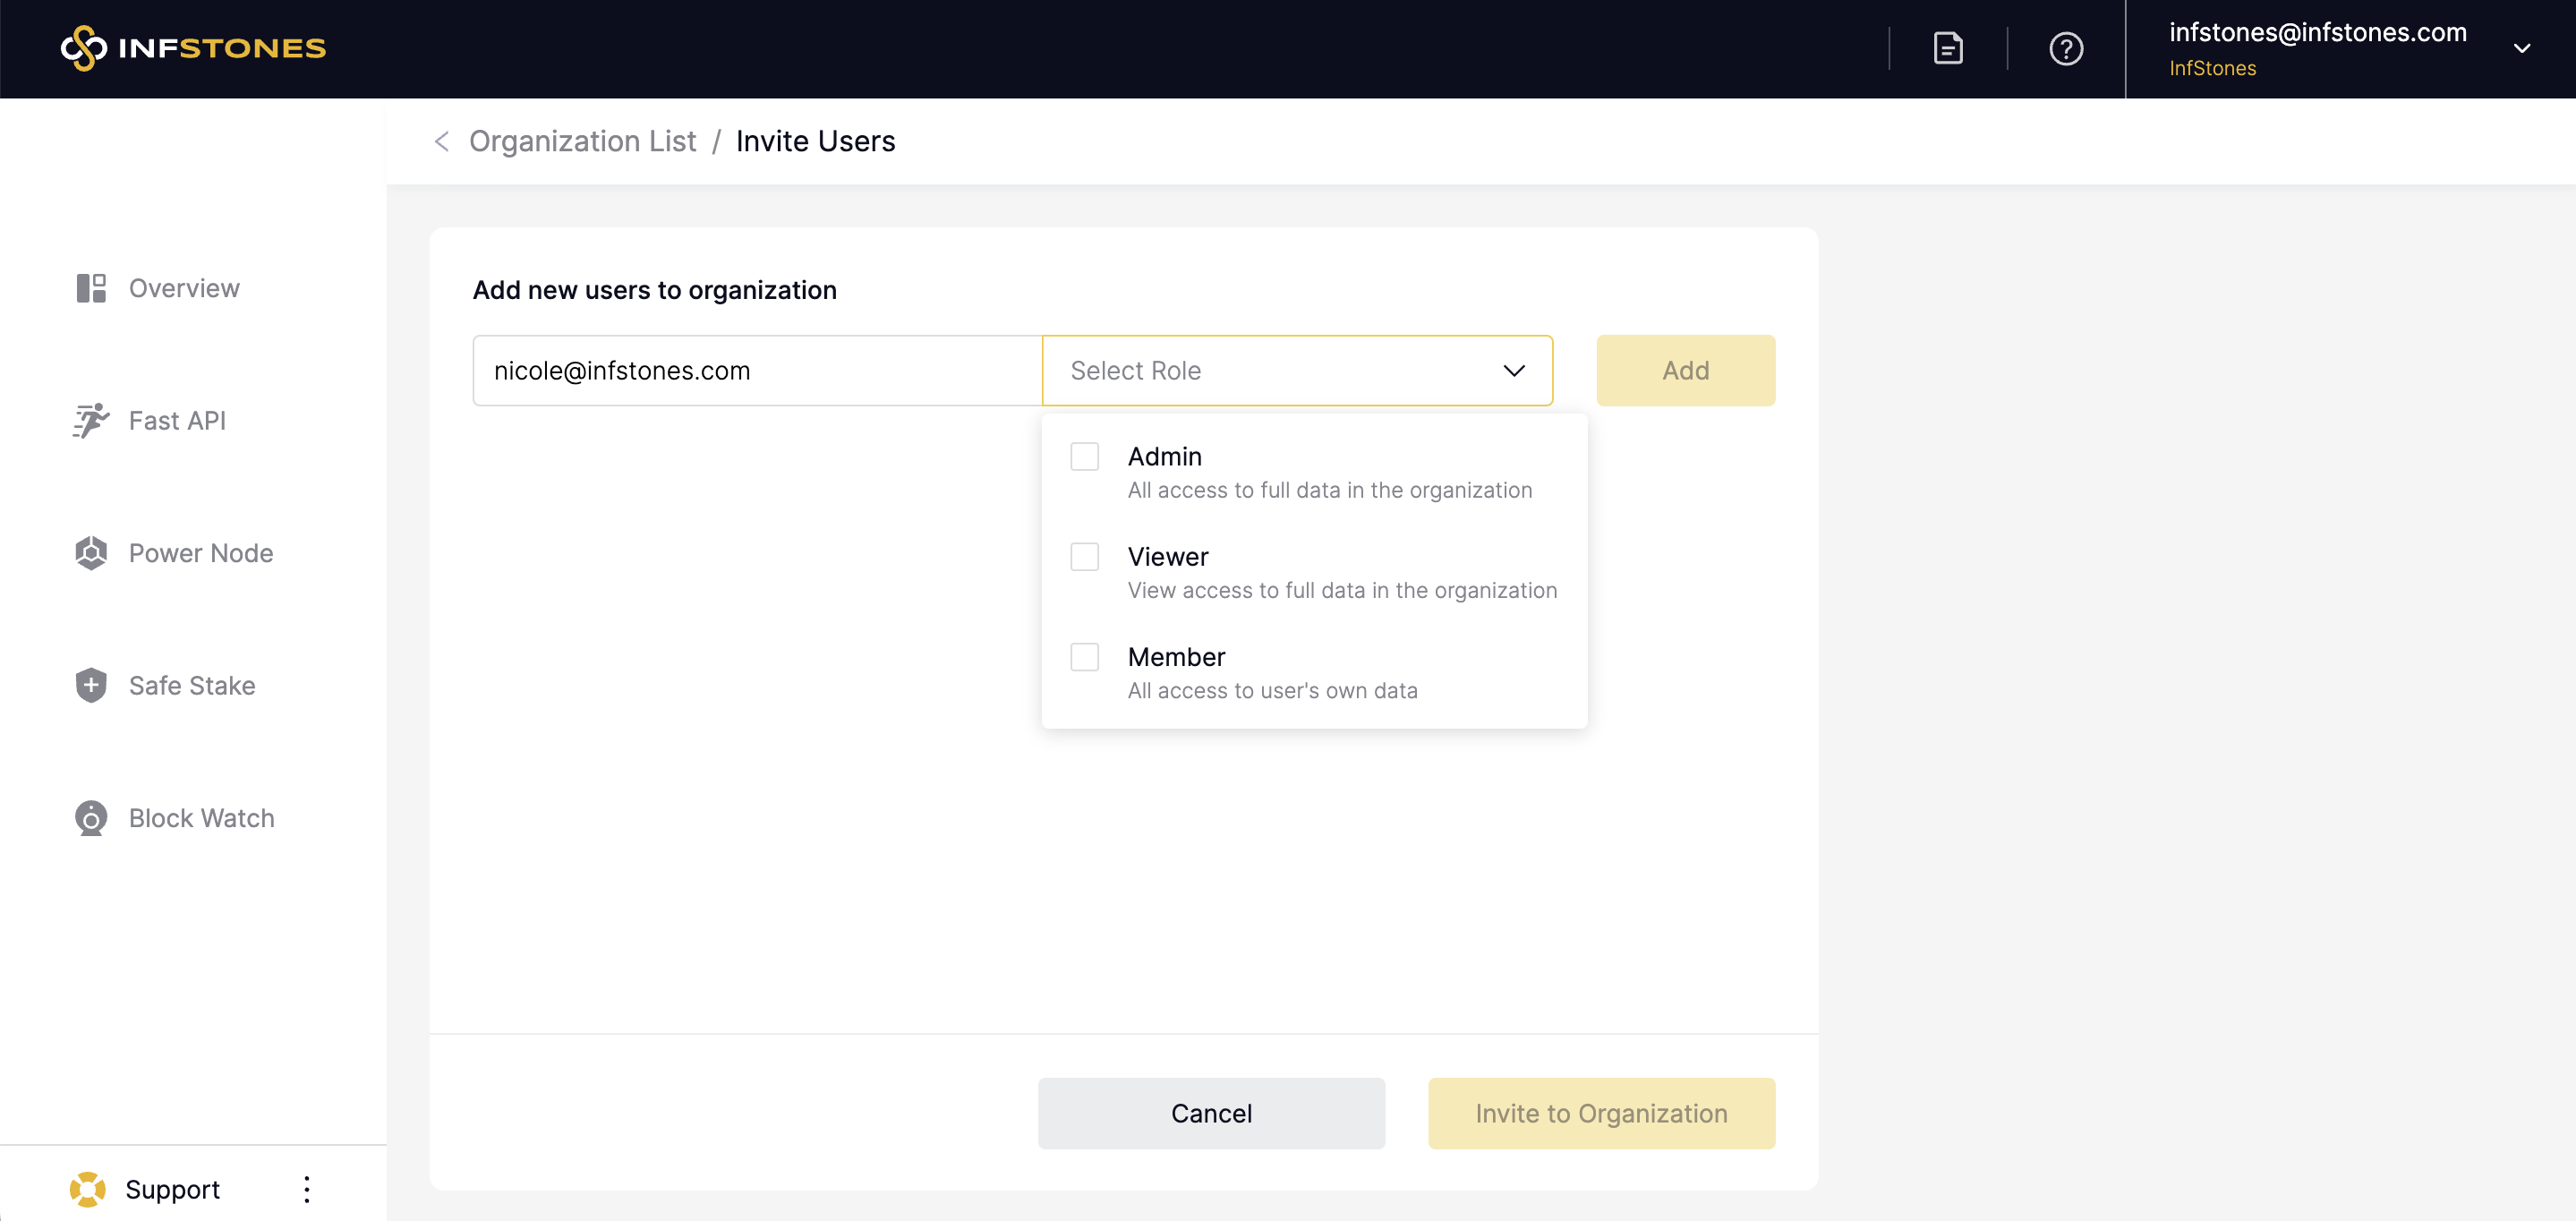
You can choose from the following roles:
- Admin - This type of user will have access to full data in the organization.
- Viewer - This type of user can view access to full data in the organization.
- Member - This type of user can access to user's own data.
1.2 Edit Role
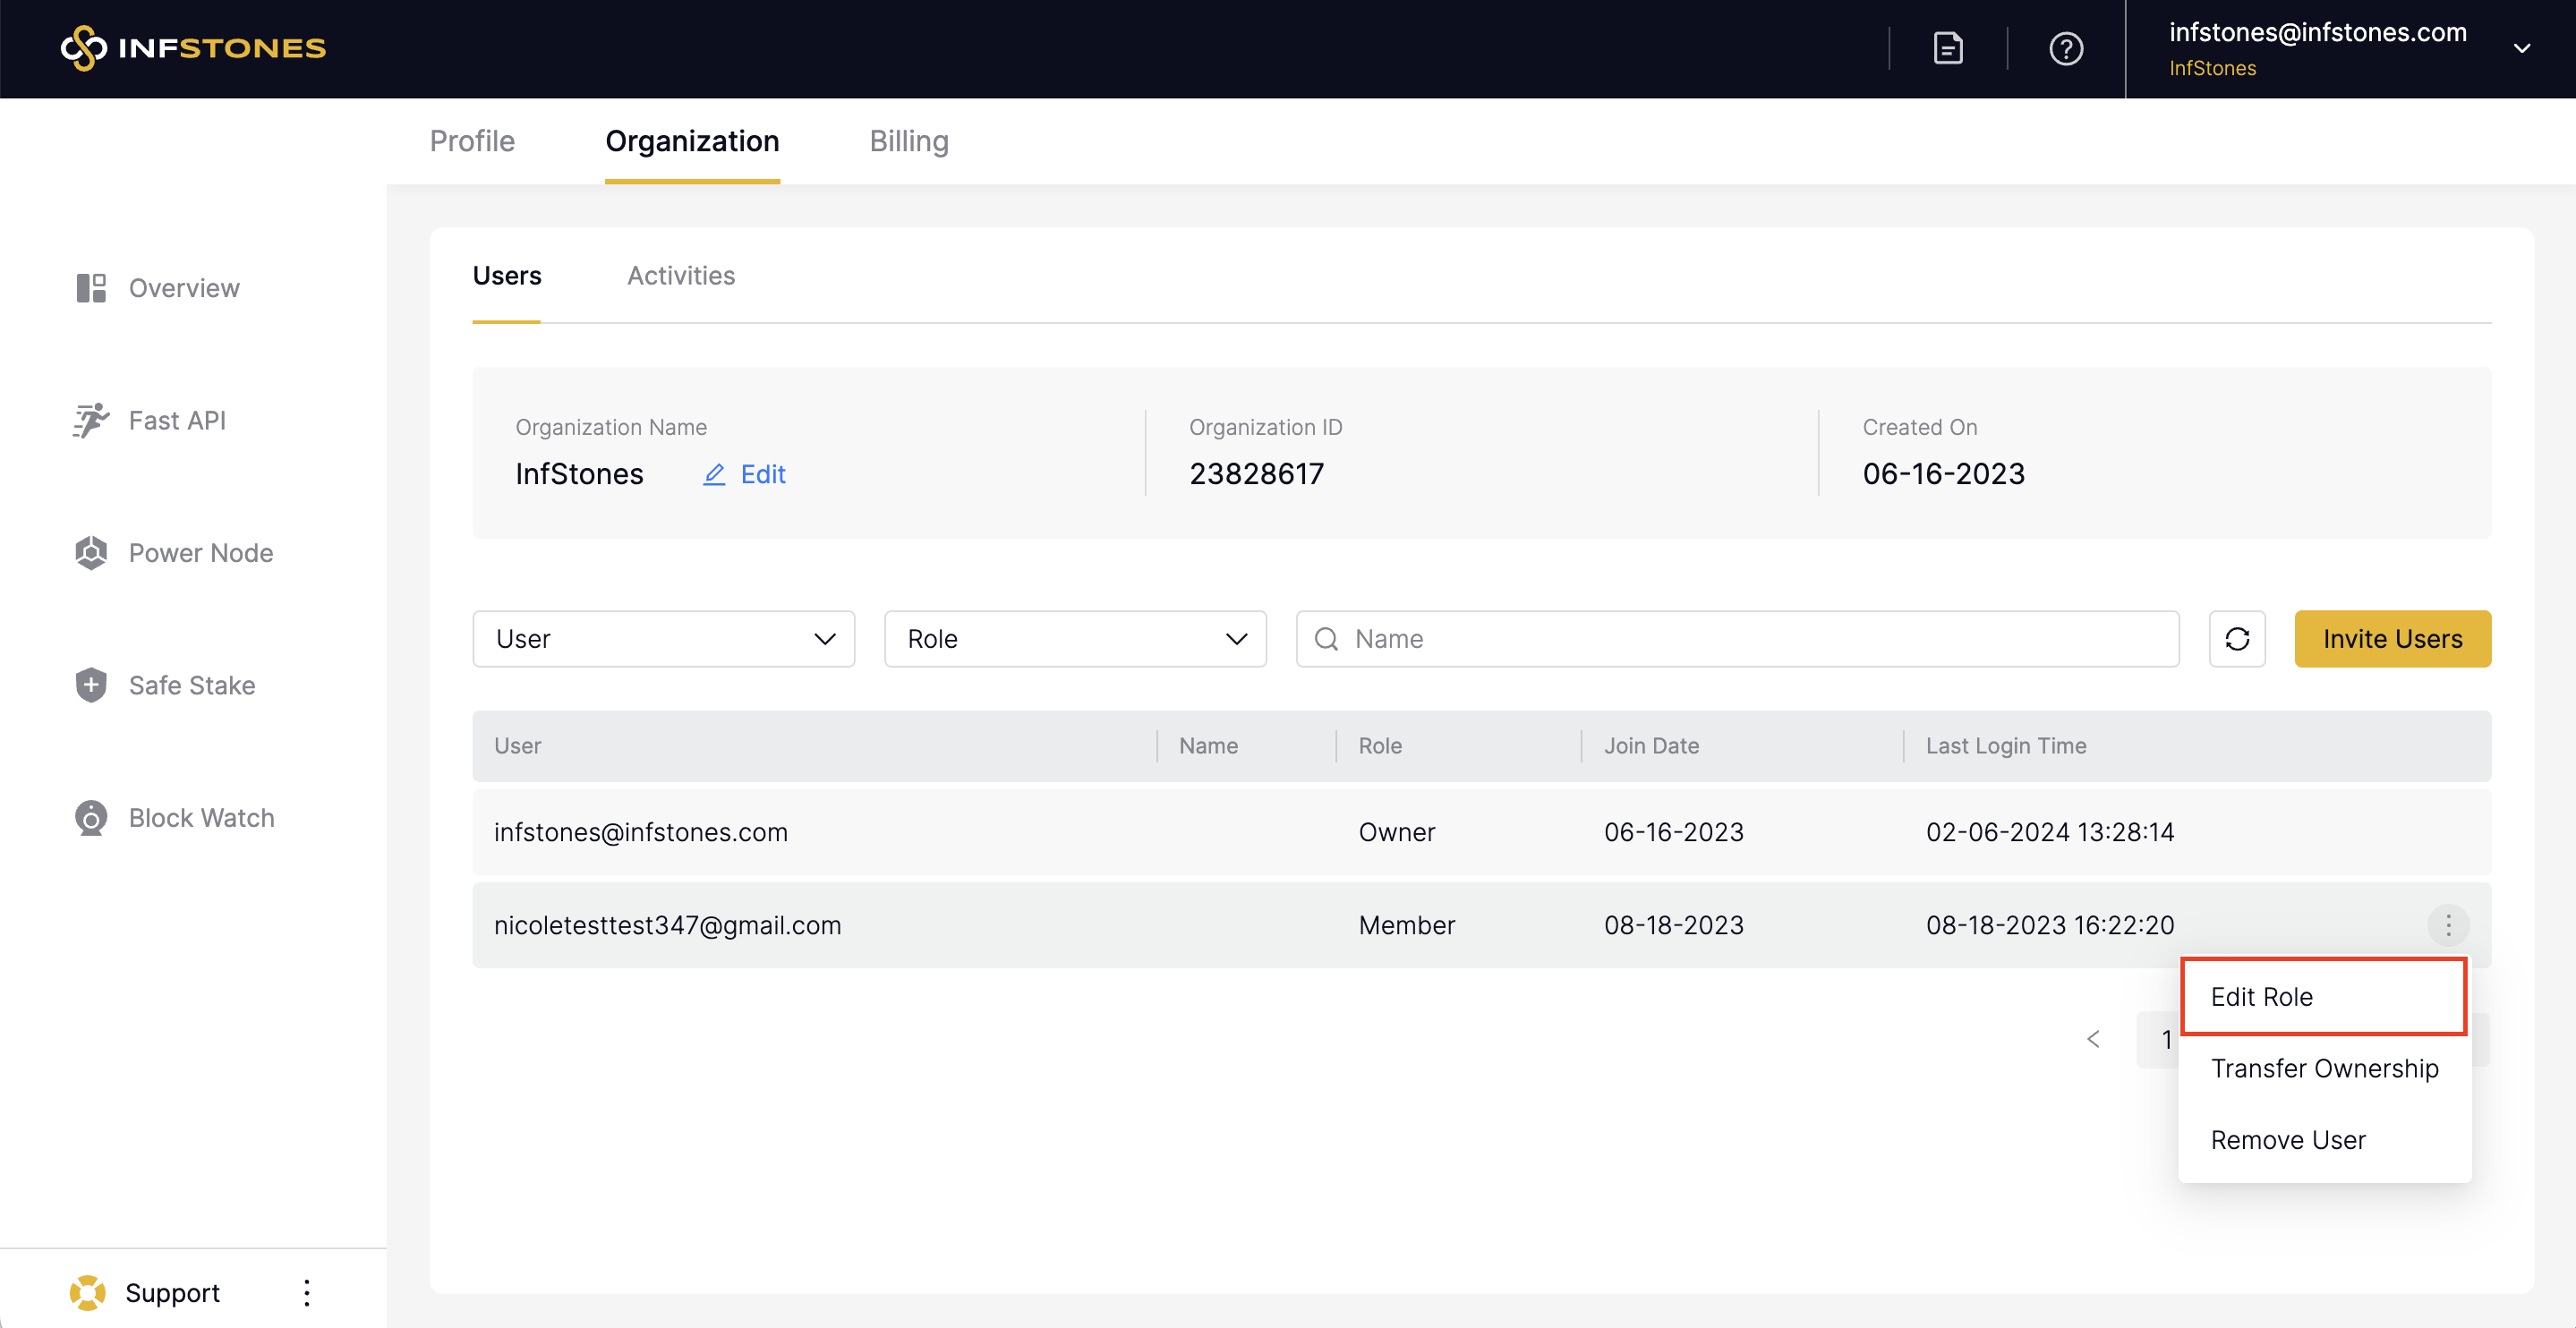
To change a user's role, open the kebab menu in the same row as their name and select the Edit Role option, as highlighted in the image below.
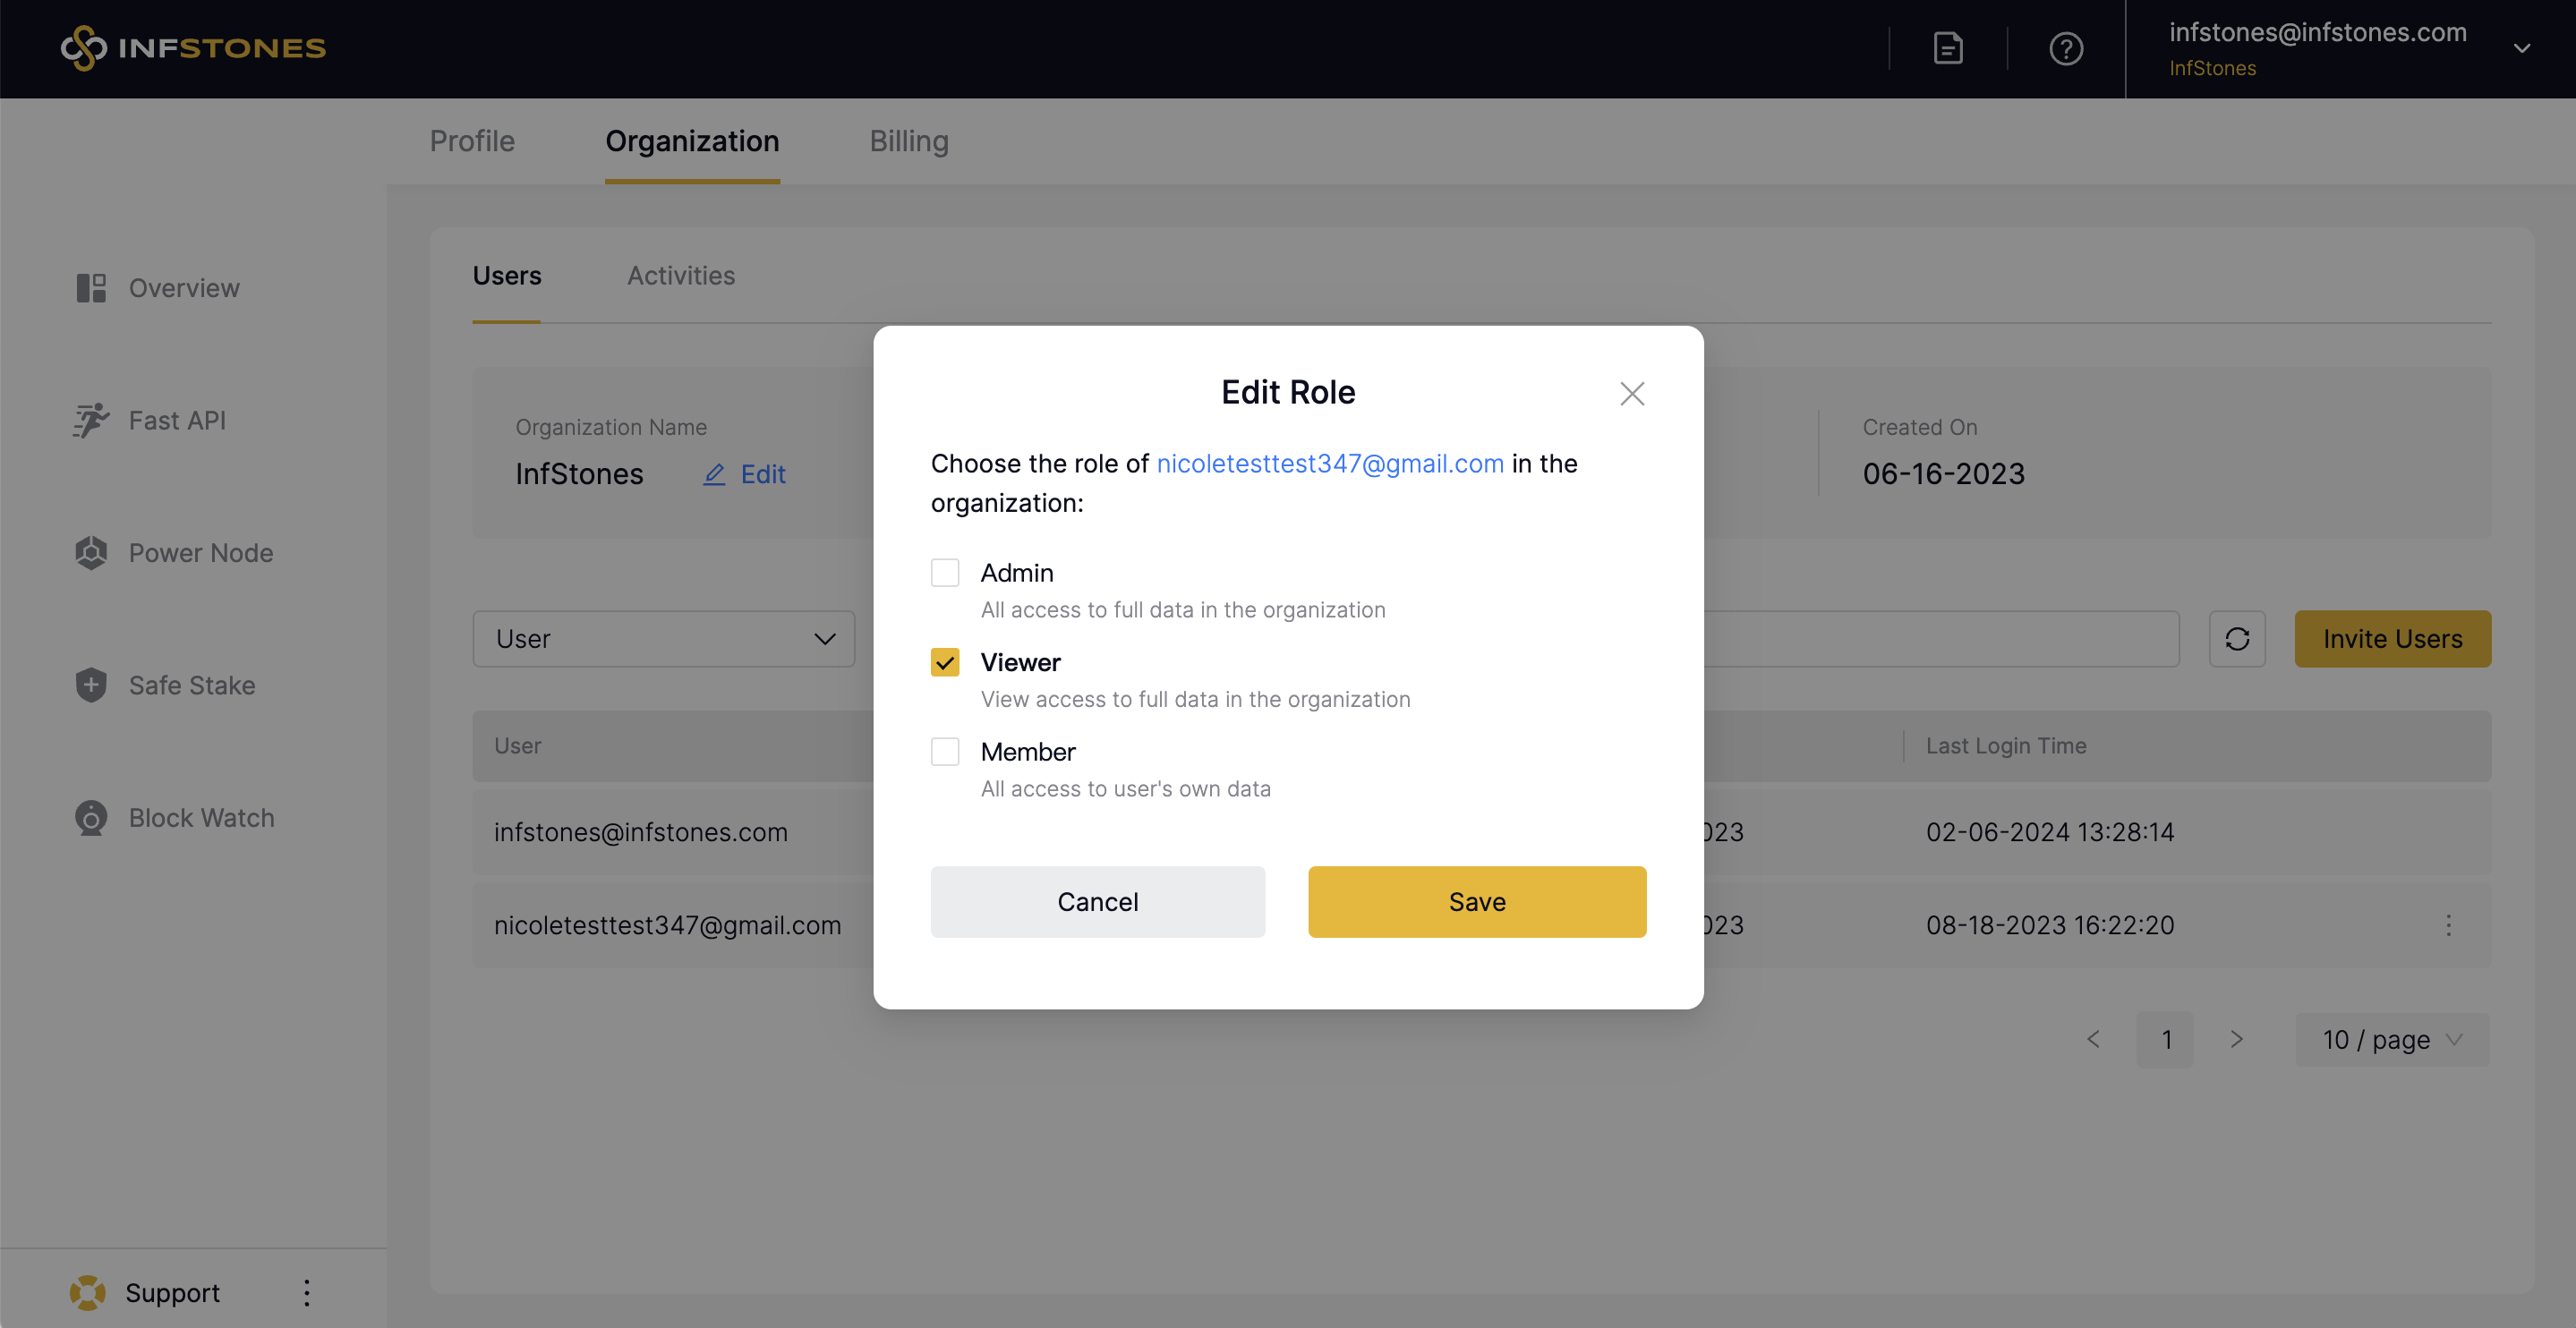
Afterward, you will be prompted to choose new roles for this user, then click the Save button to complete editing.
1.3 Remove User
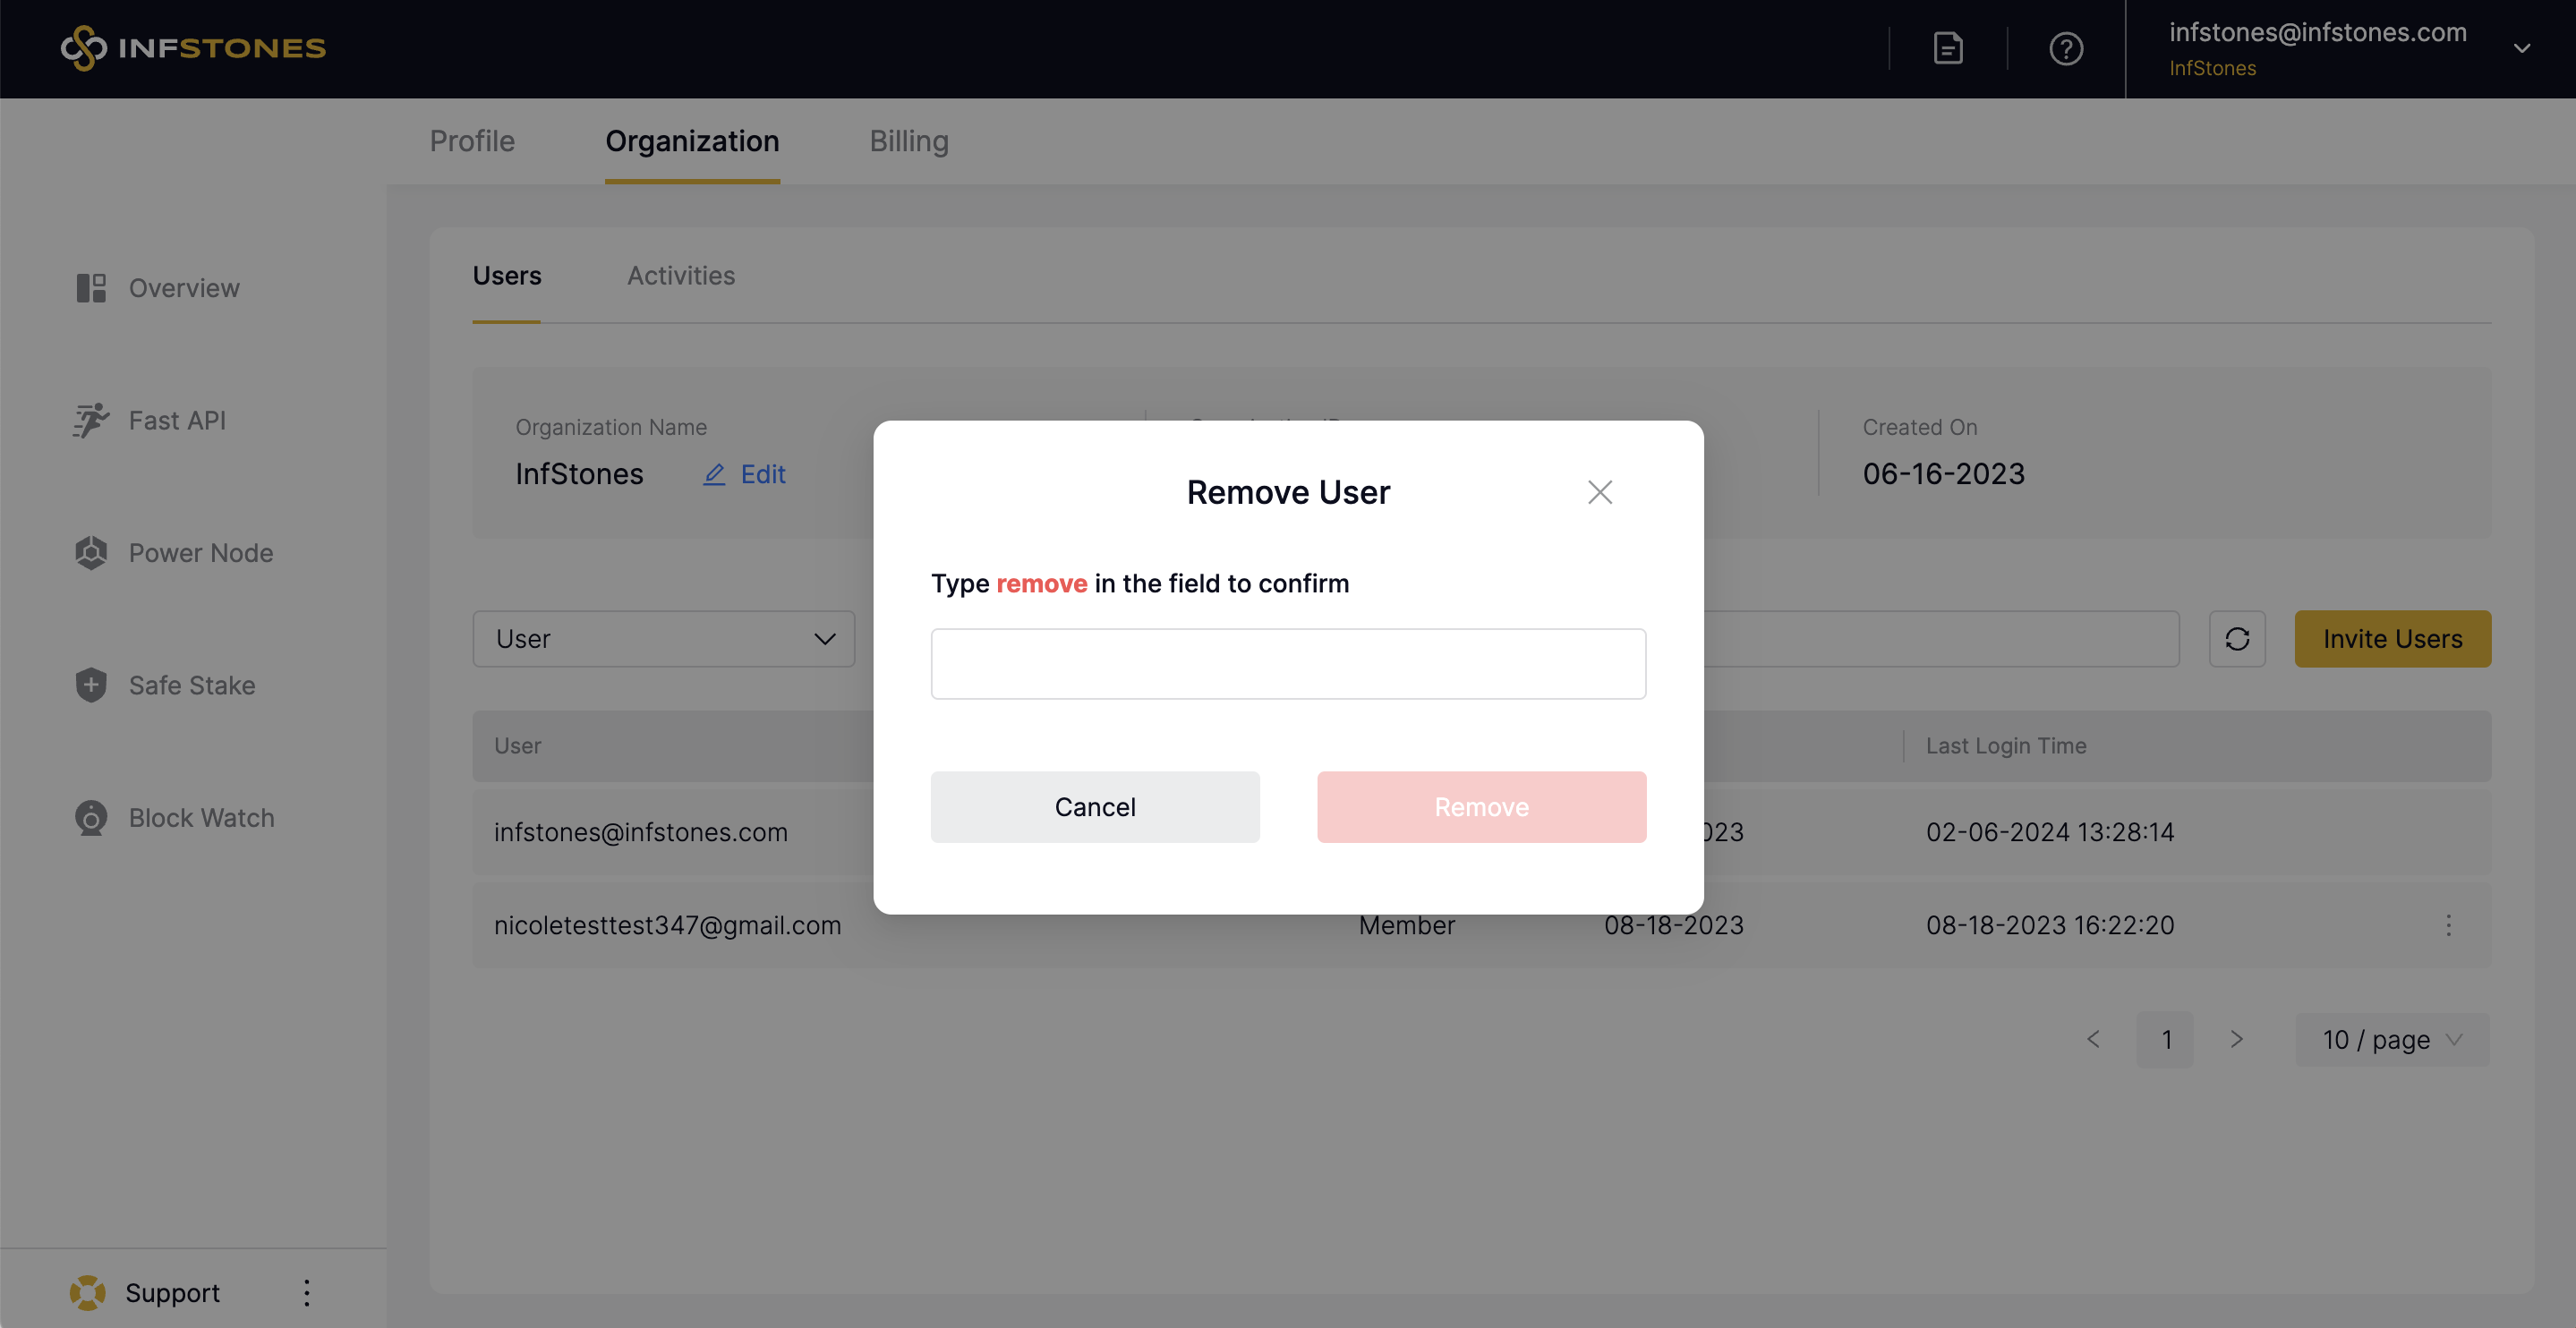
To remove a user from your organization, go over to the menu and select the Remove User option, as shown below.

Type "remove" in the blank space and click the Remove button.
Once this process is completed, the user should be removed from your organization.
If you want to remove a user, you'll be prompted to first transfer their data to another user of the organization.
2 Manage Organization
2.1 Edit Organization Name
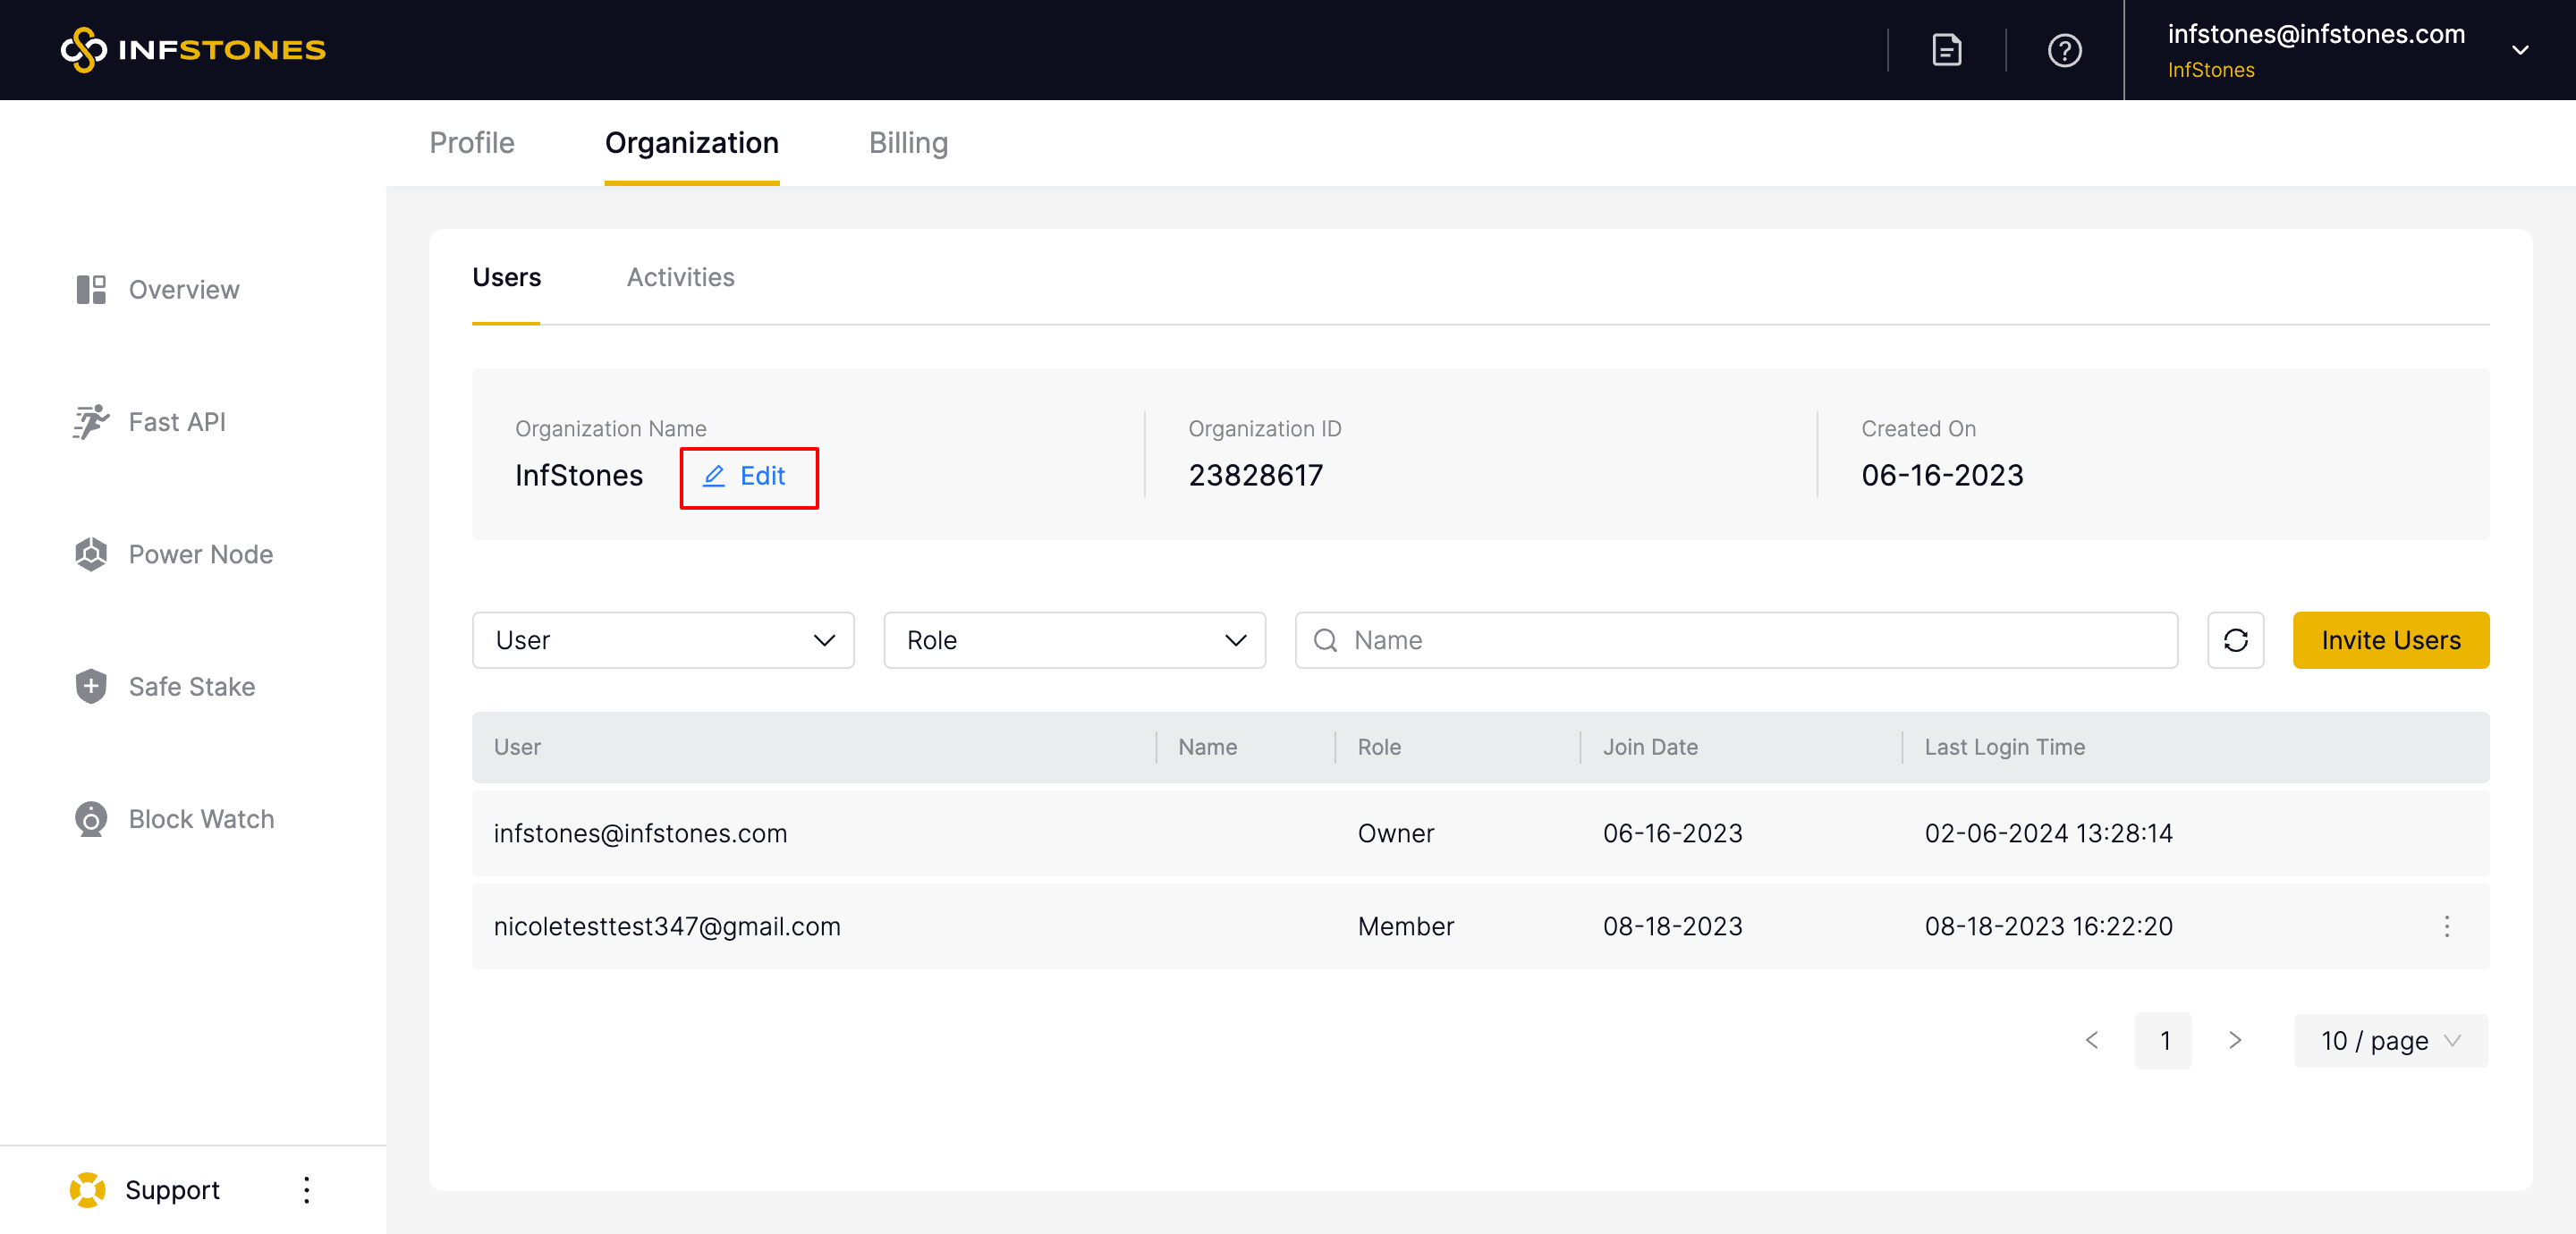
To change the name of your organization, go to the organization page and click the Edit button next to the current name.
Once you've chosen a name, check the box to save the changes.
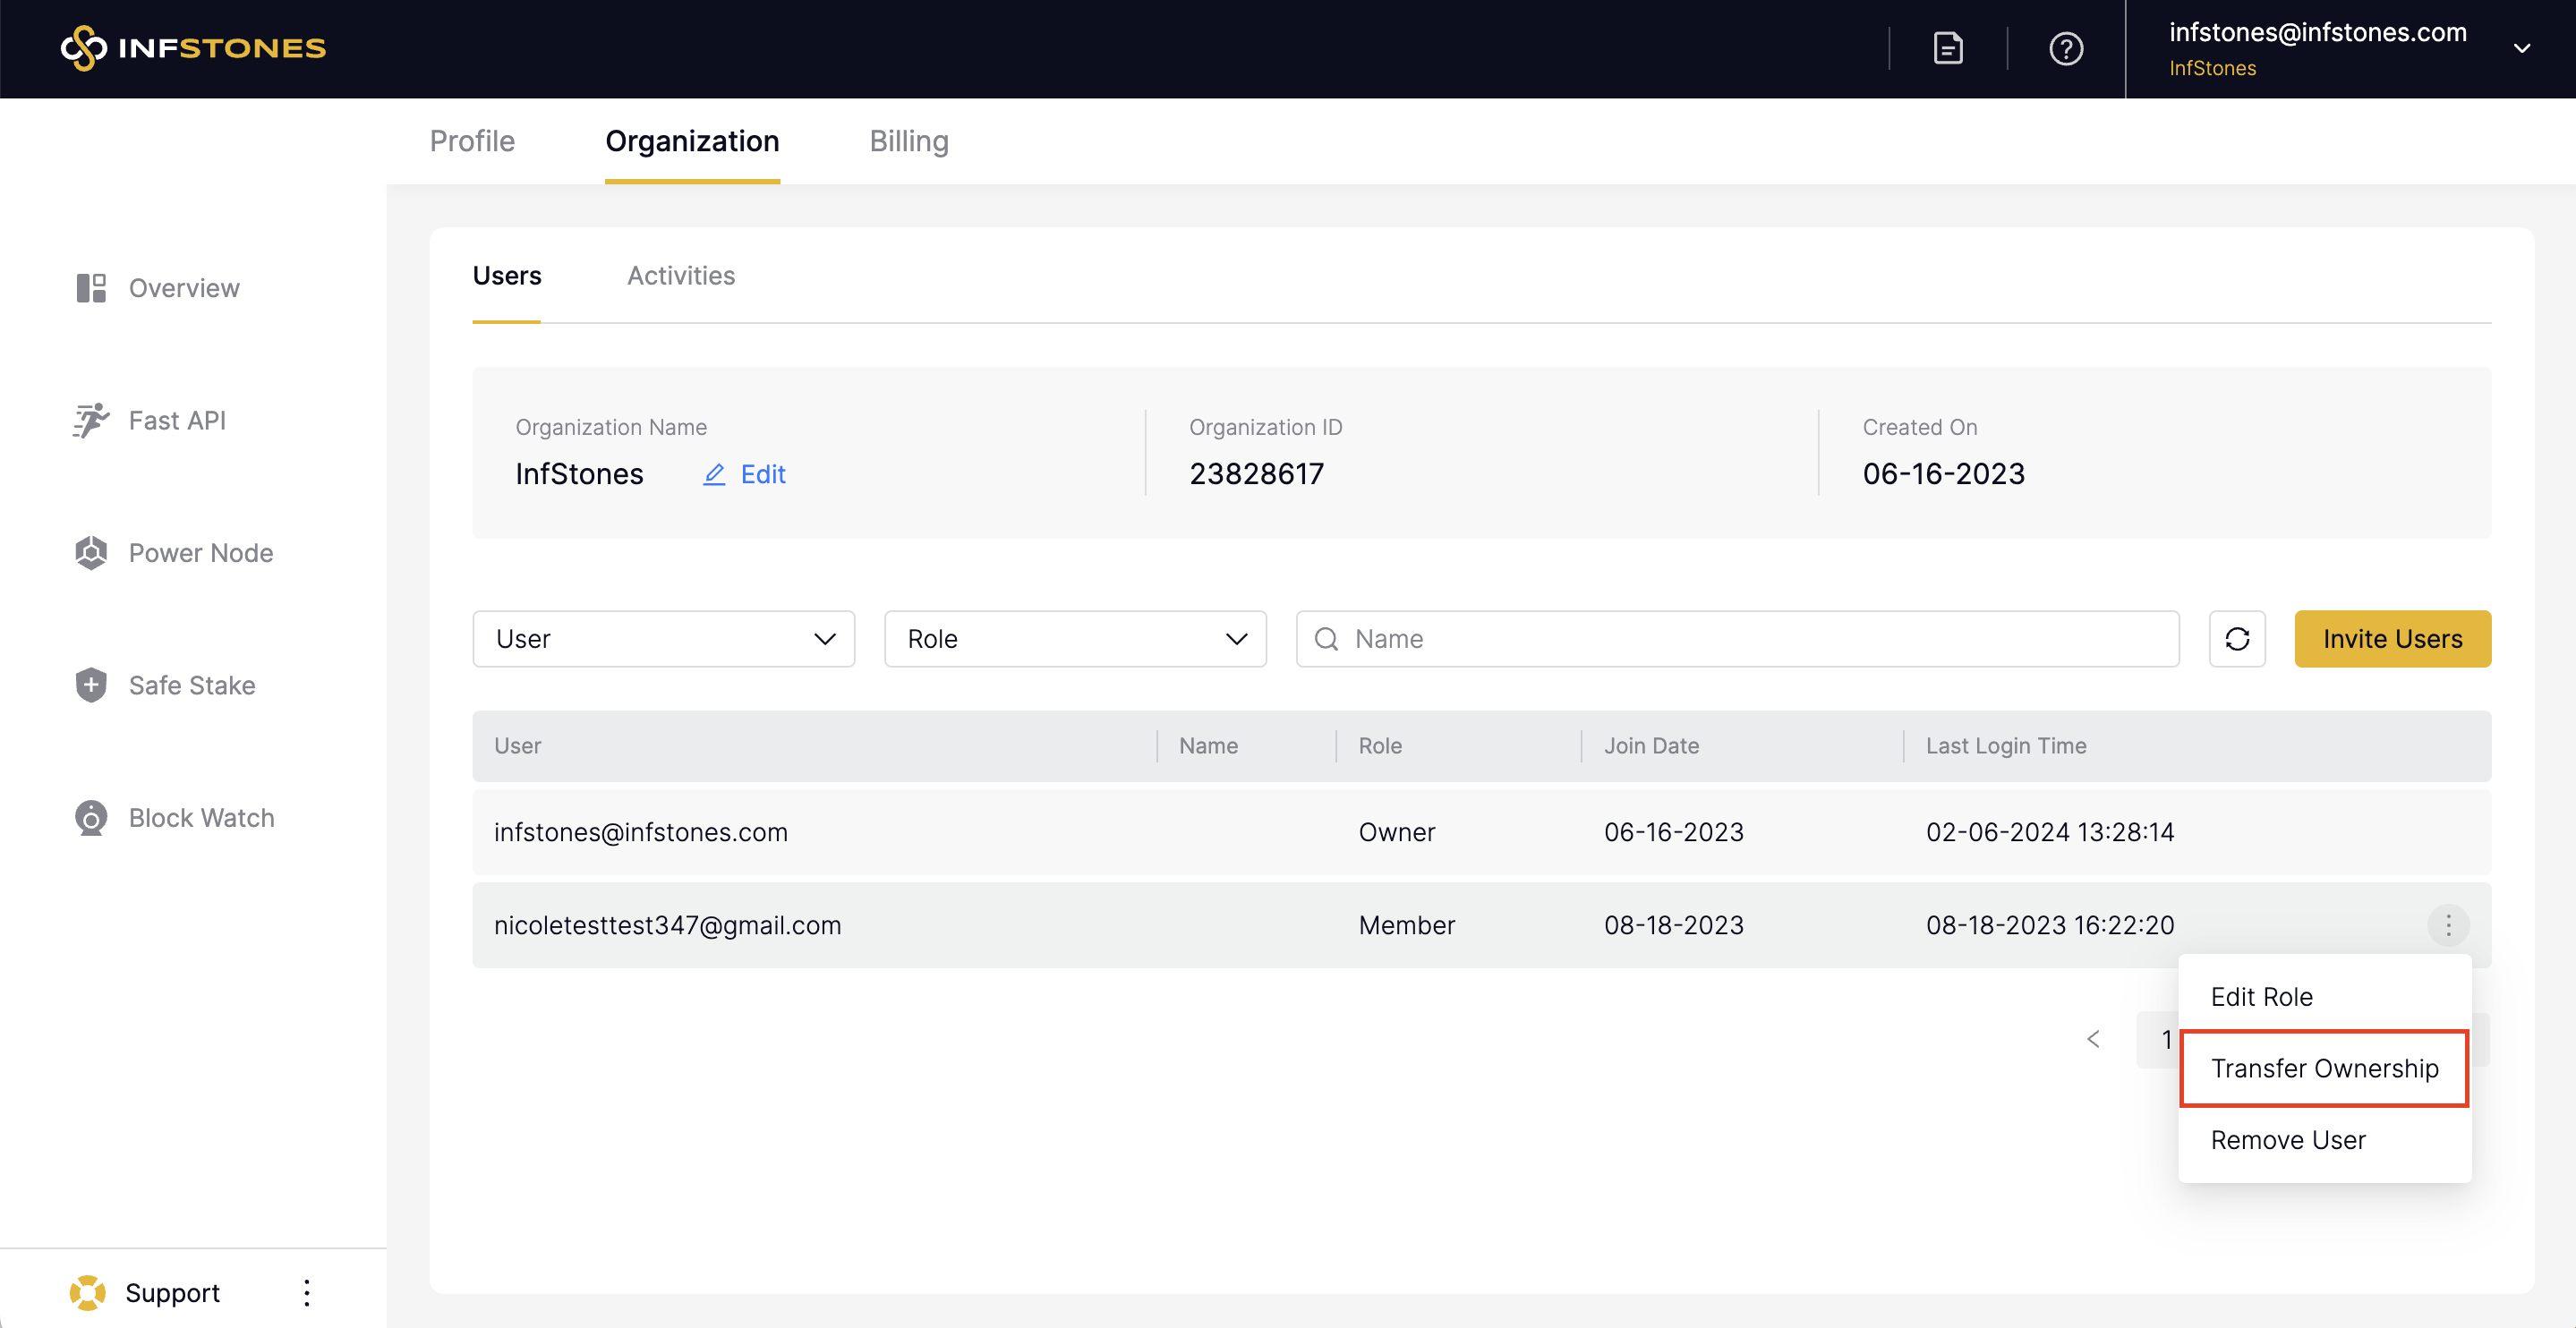
2.2 Transfer Ownership
Before you can transfer ownership of your organization to a new user, the user must first be invited to join your organization.
Select a preferred user from your organization's user list and click the Transfer Ownership button, as shown below.
Click the Confirmbutton to finish the process.
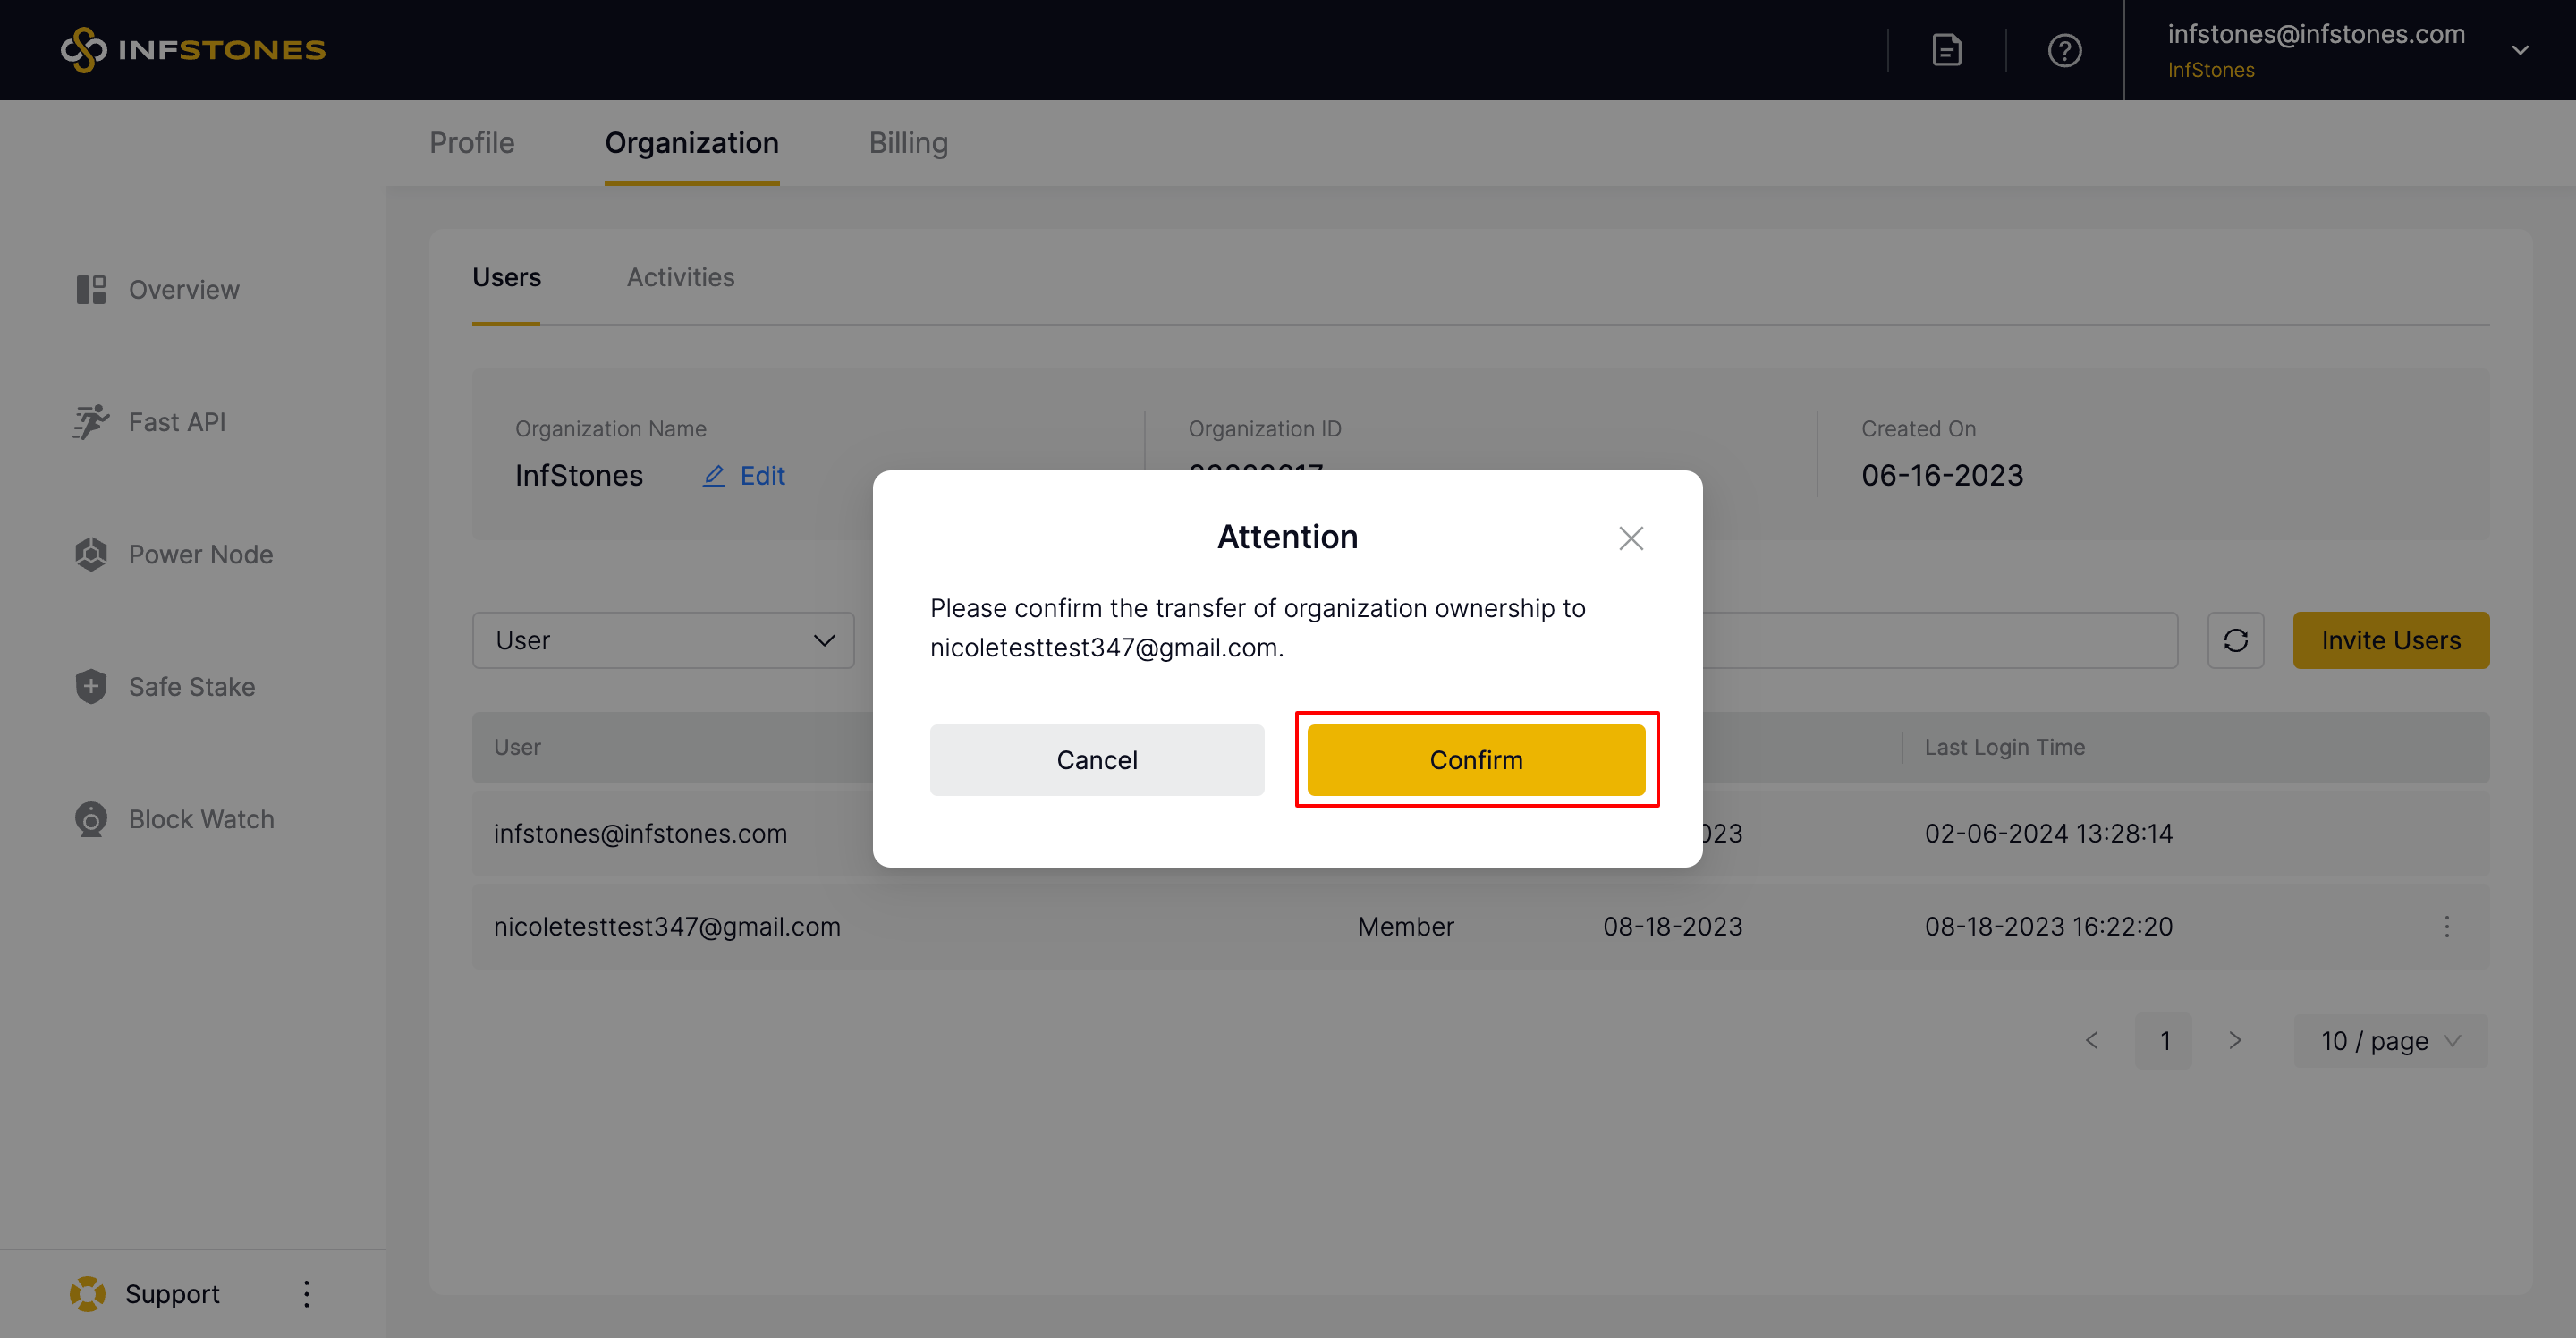
Once the process is completed, the new user should have complete control of the organization.
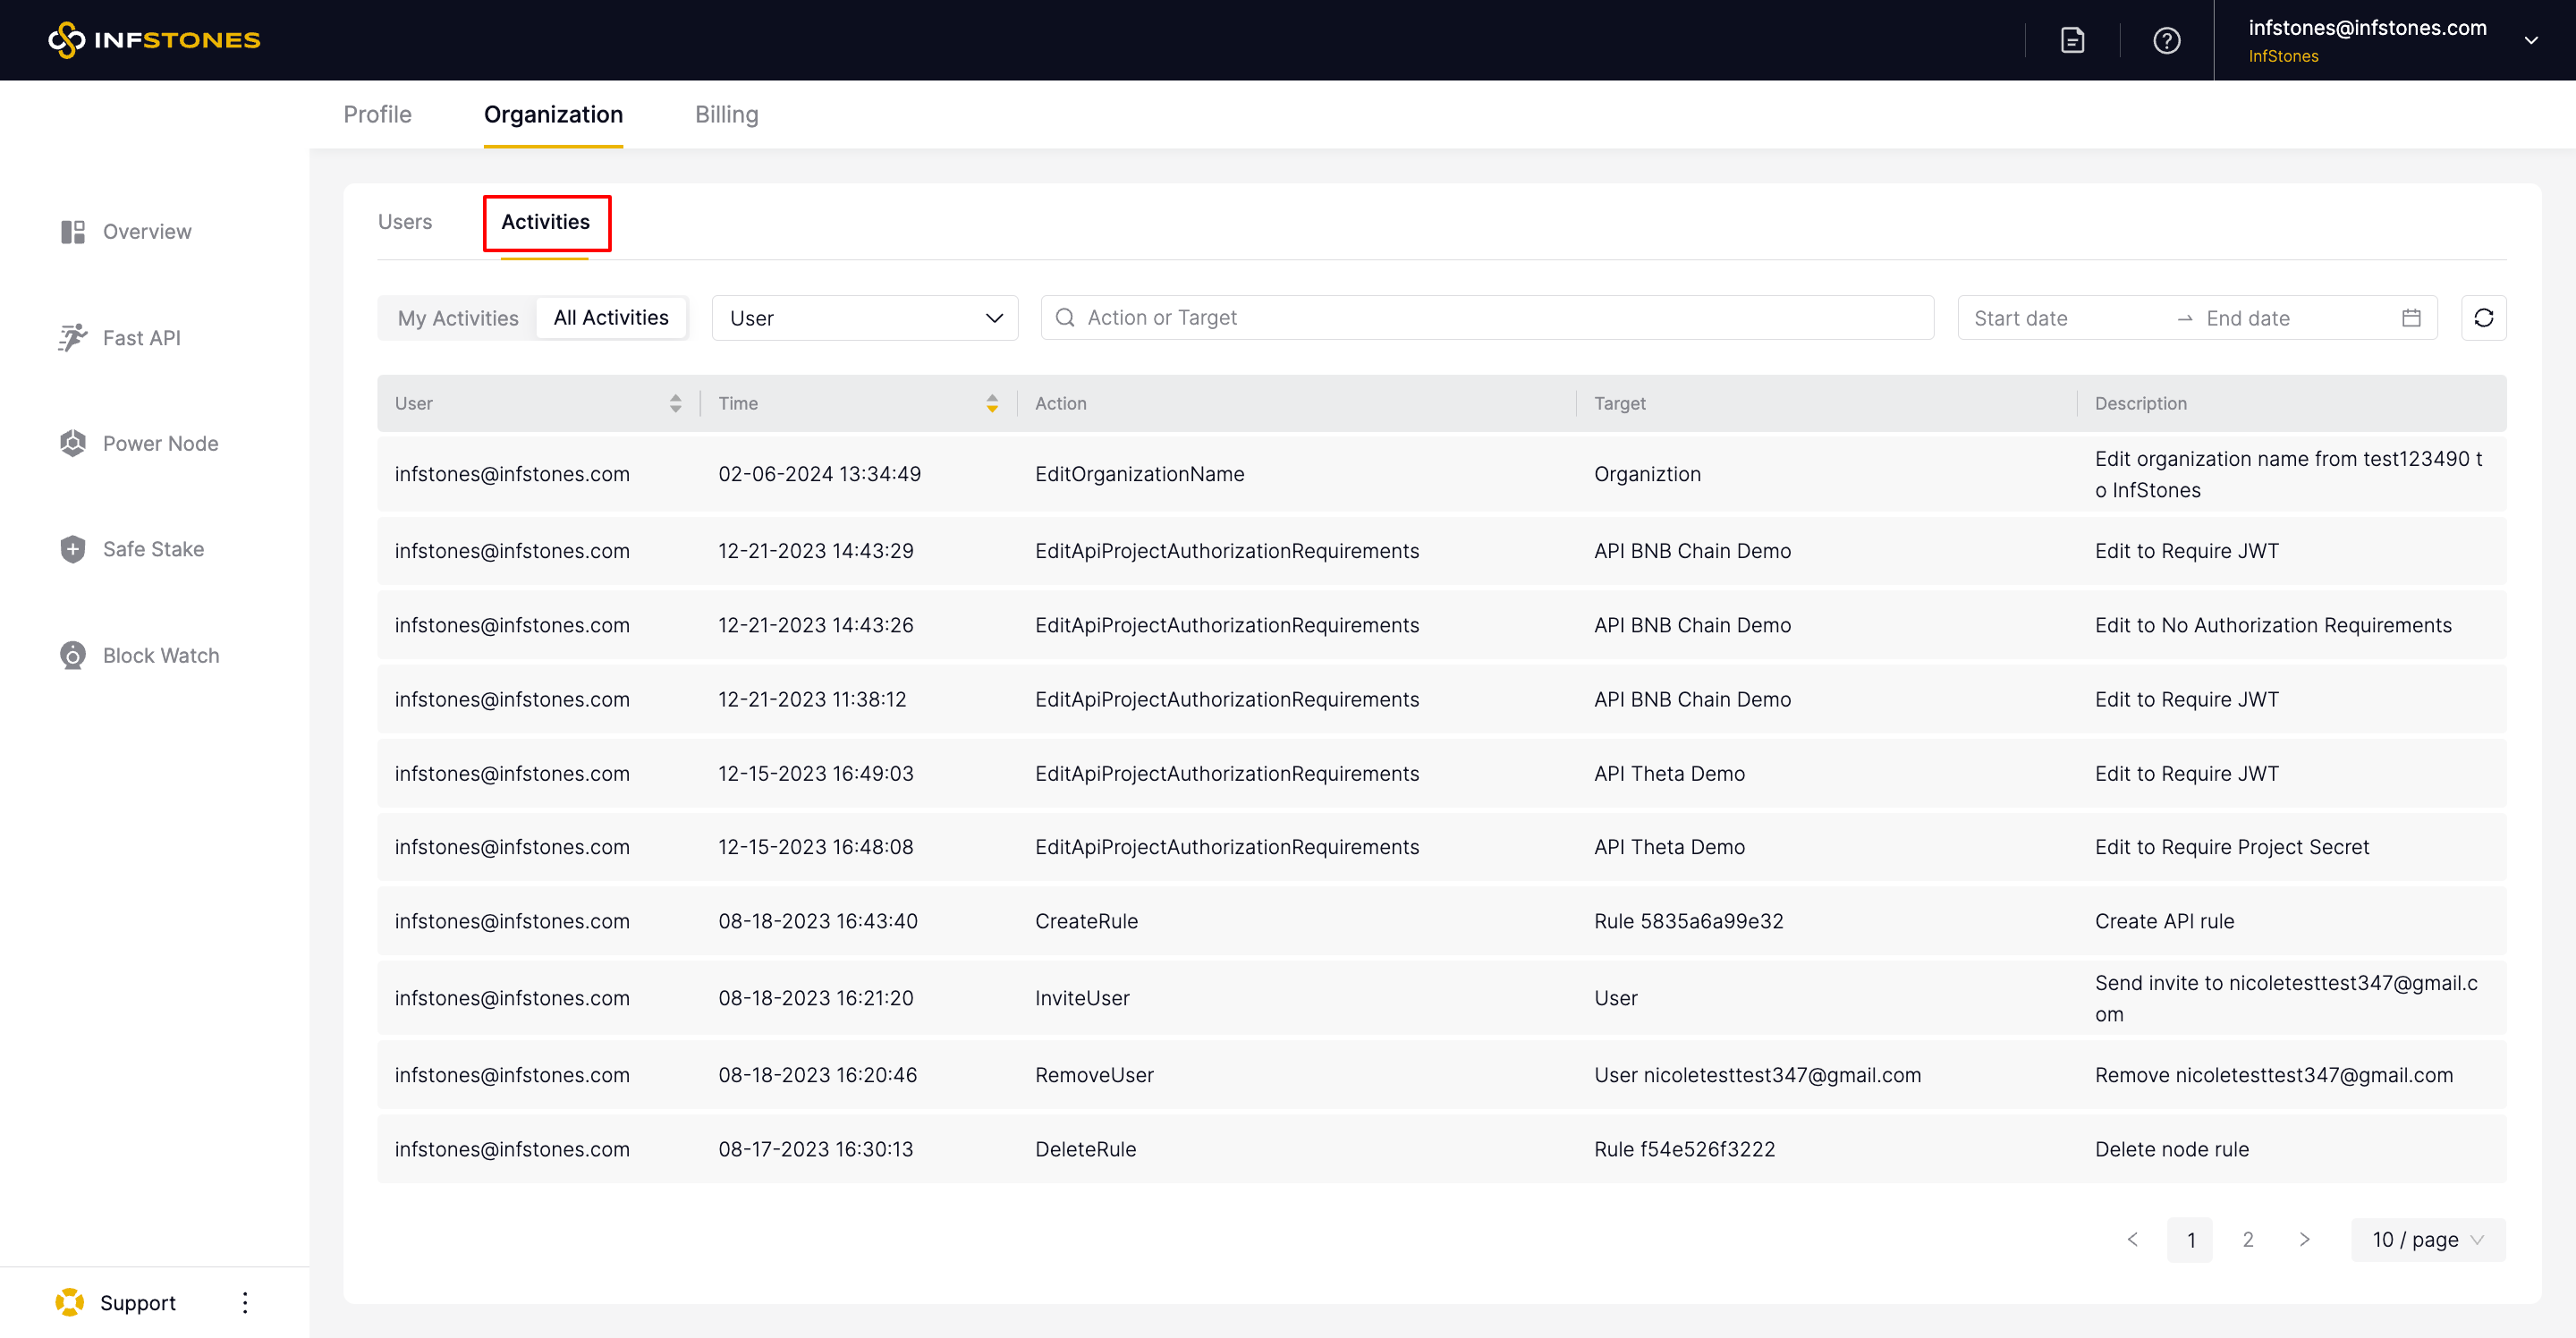
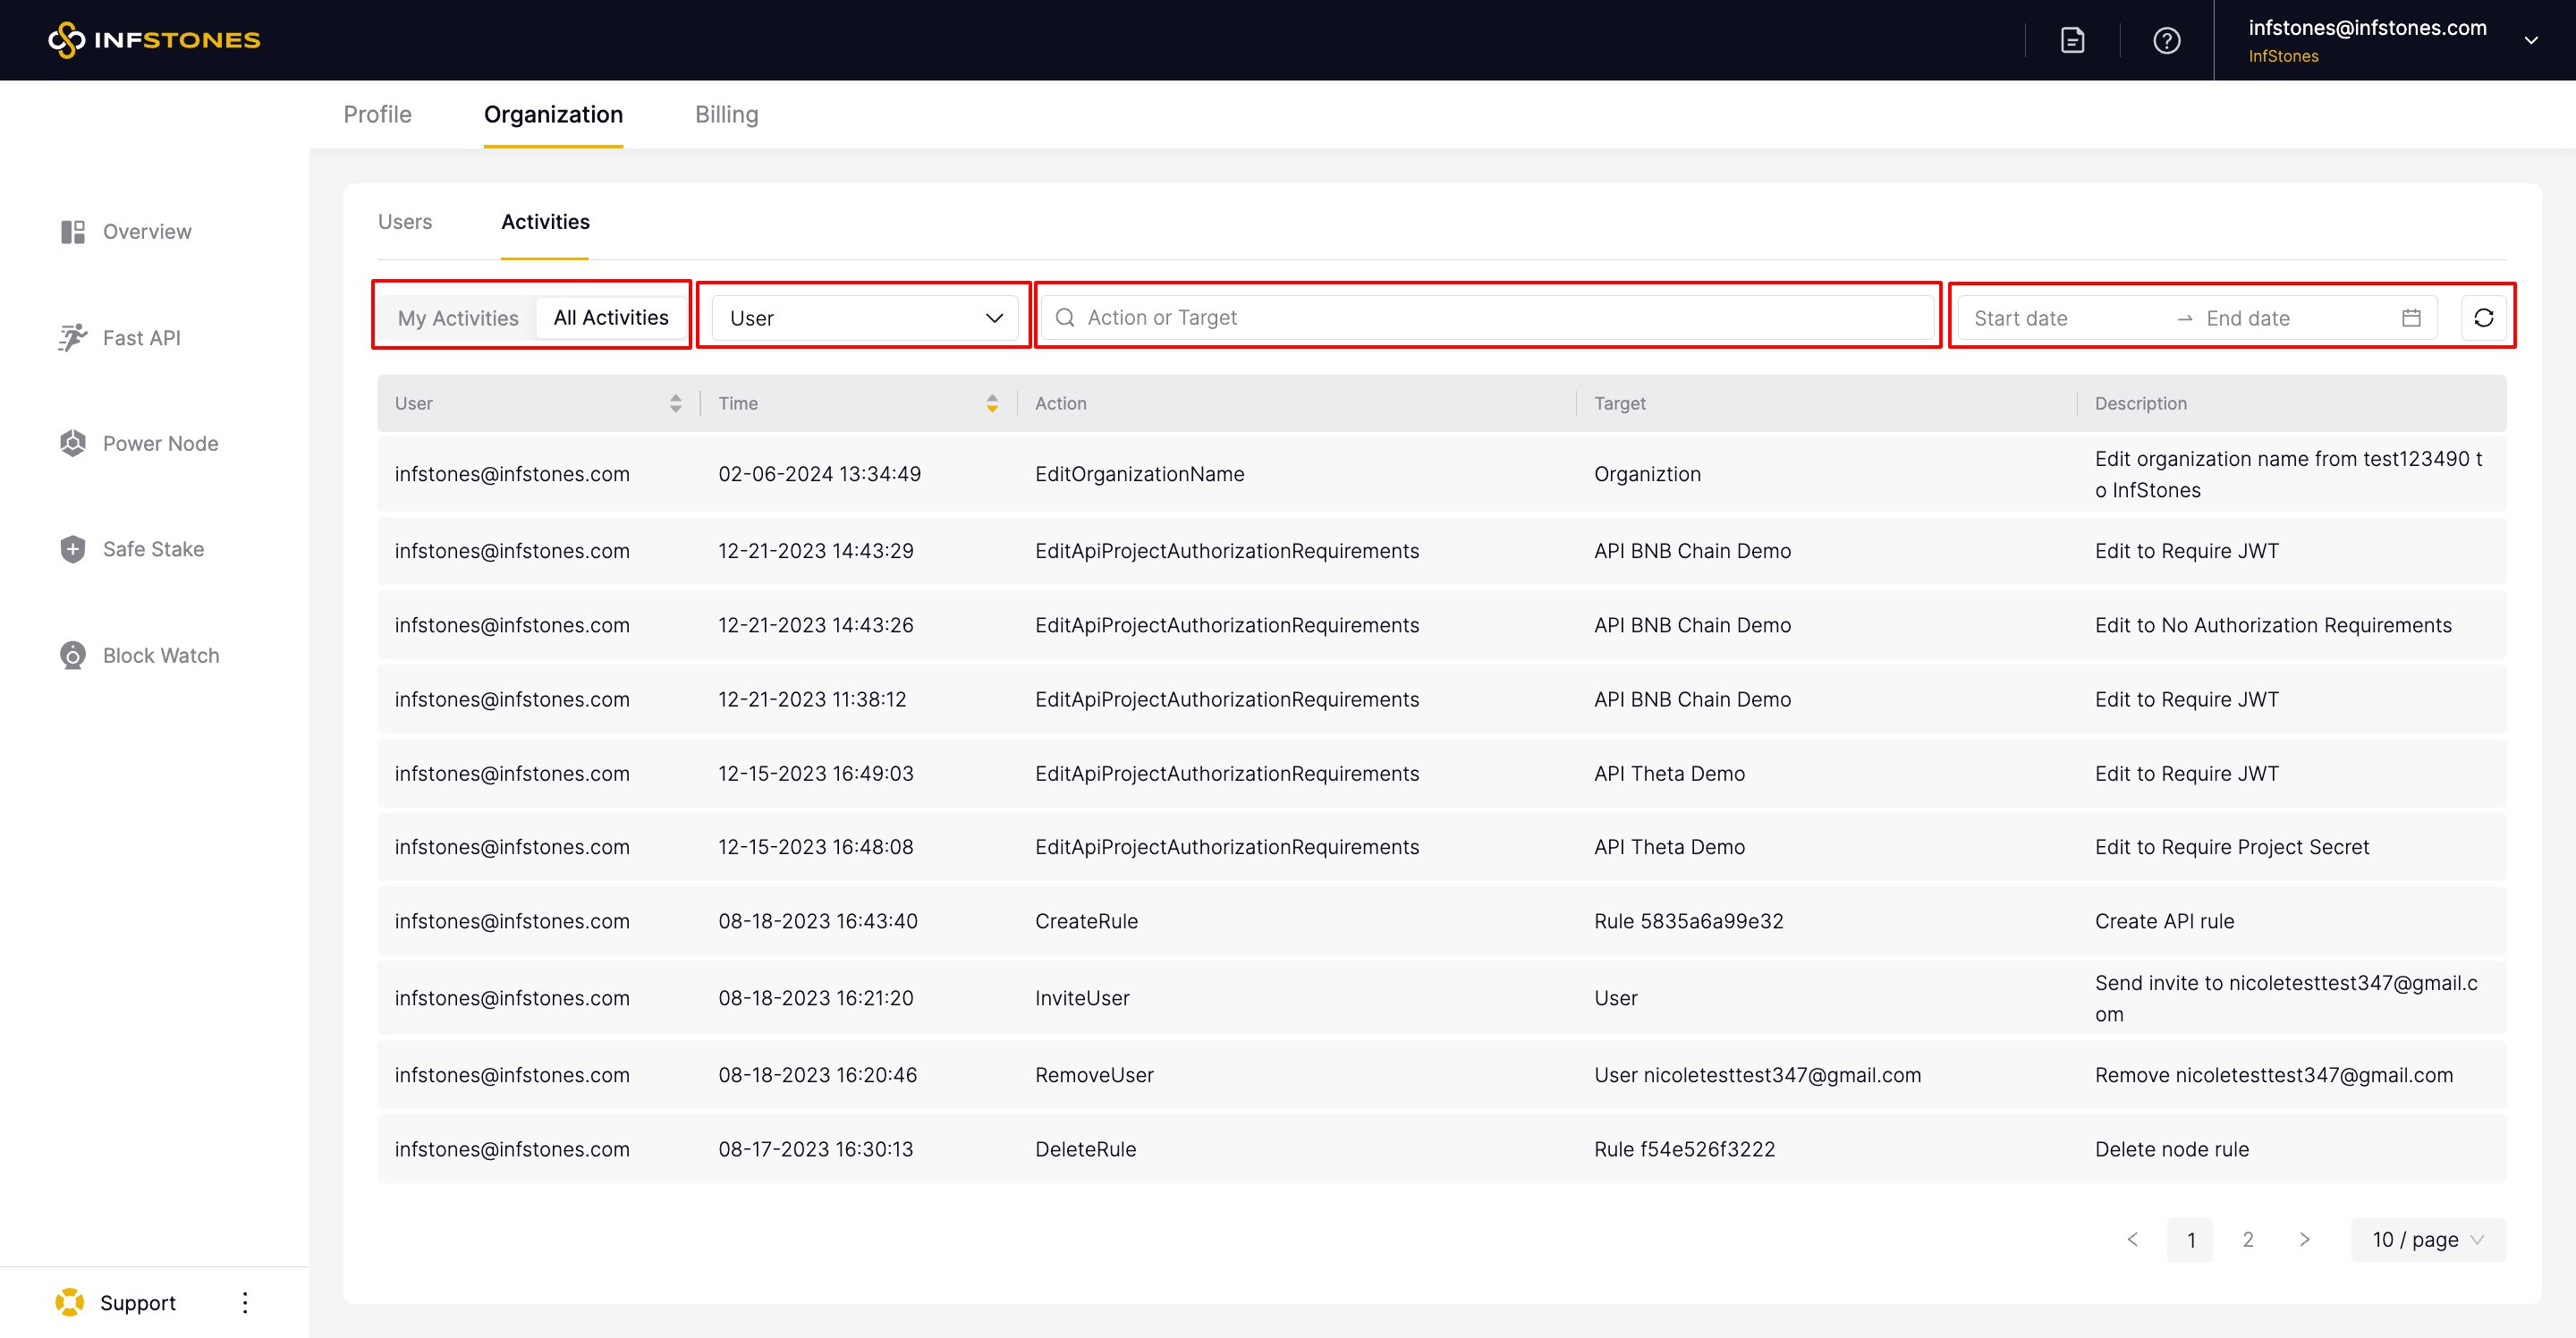
3 Organization Activities
As an organization Owner/Admin/Viewer, you can keep track of all the activities that take place in your organization, such as which events were carried out by which user, when the events were carried out, and the specific event target.
To begin, navigate to the Activities tab under Organization section, and you should see a table listing all of your organization's activities.
You can also search through all of the activities and filter them by name or date.
Updated 9 months ago