Power Node - Get Started
1 Launch Node
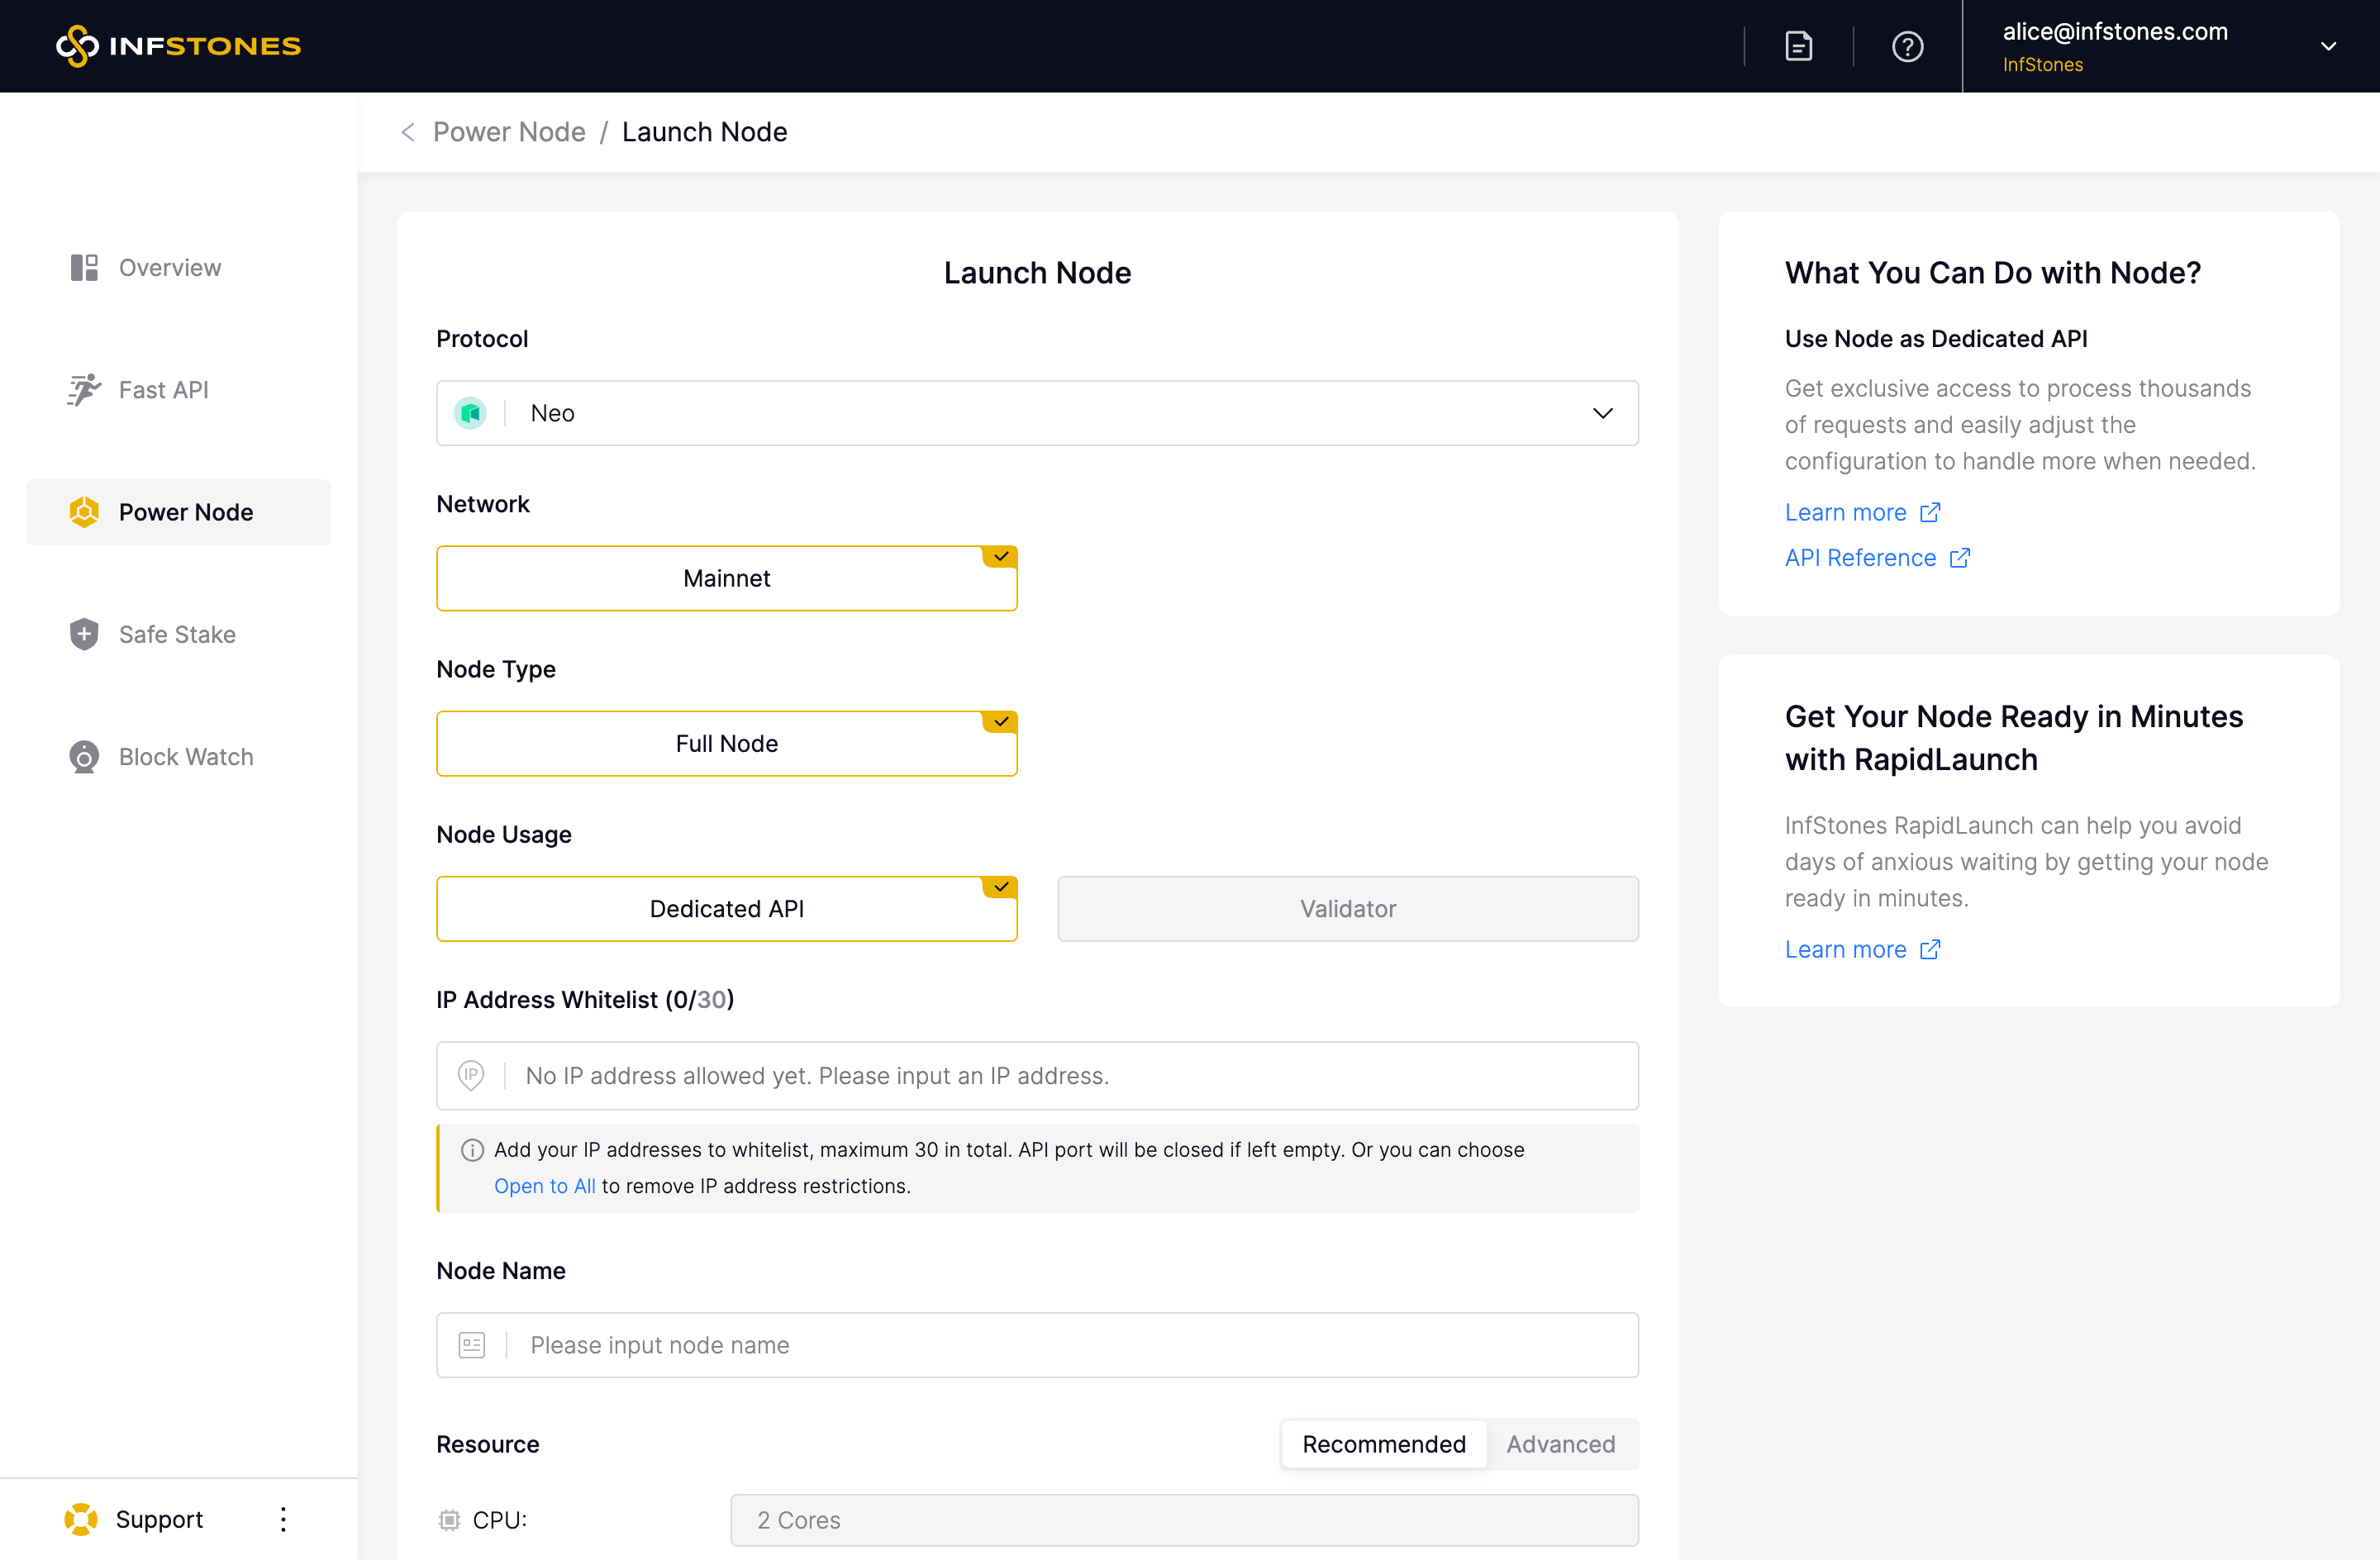
Please note that unless the blockchain is marked as Archive, the node set up on the platform will be a full node.
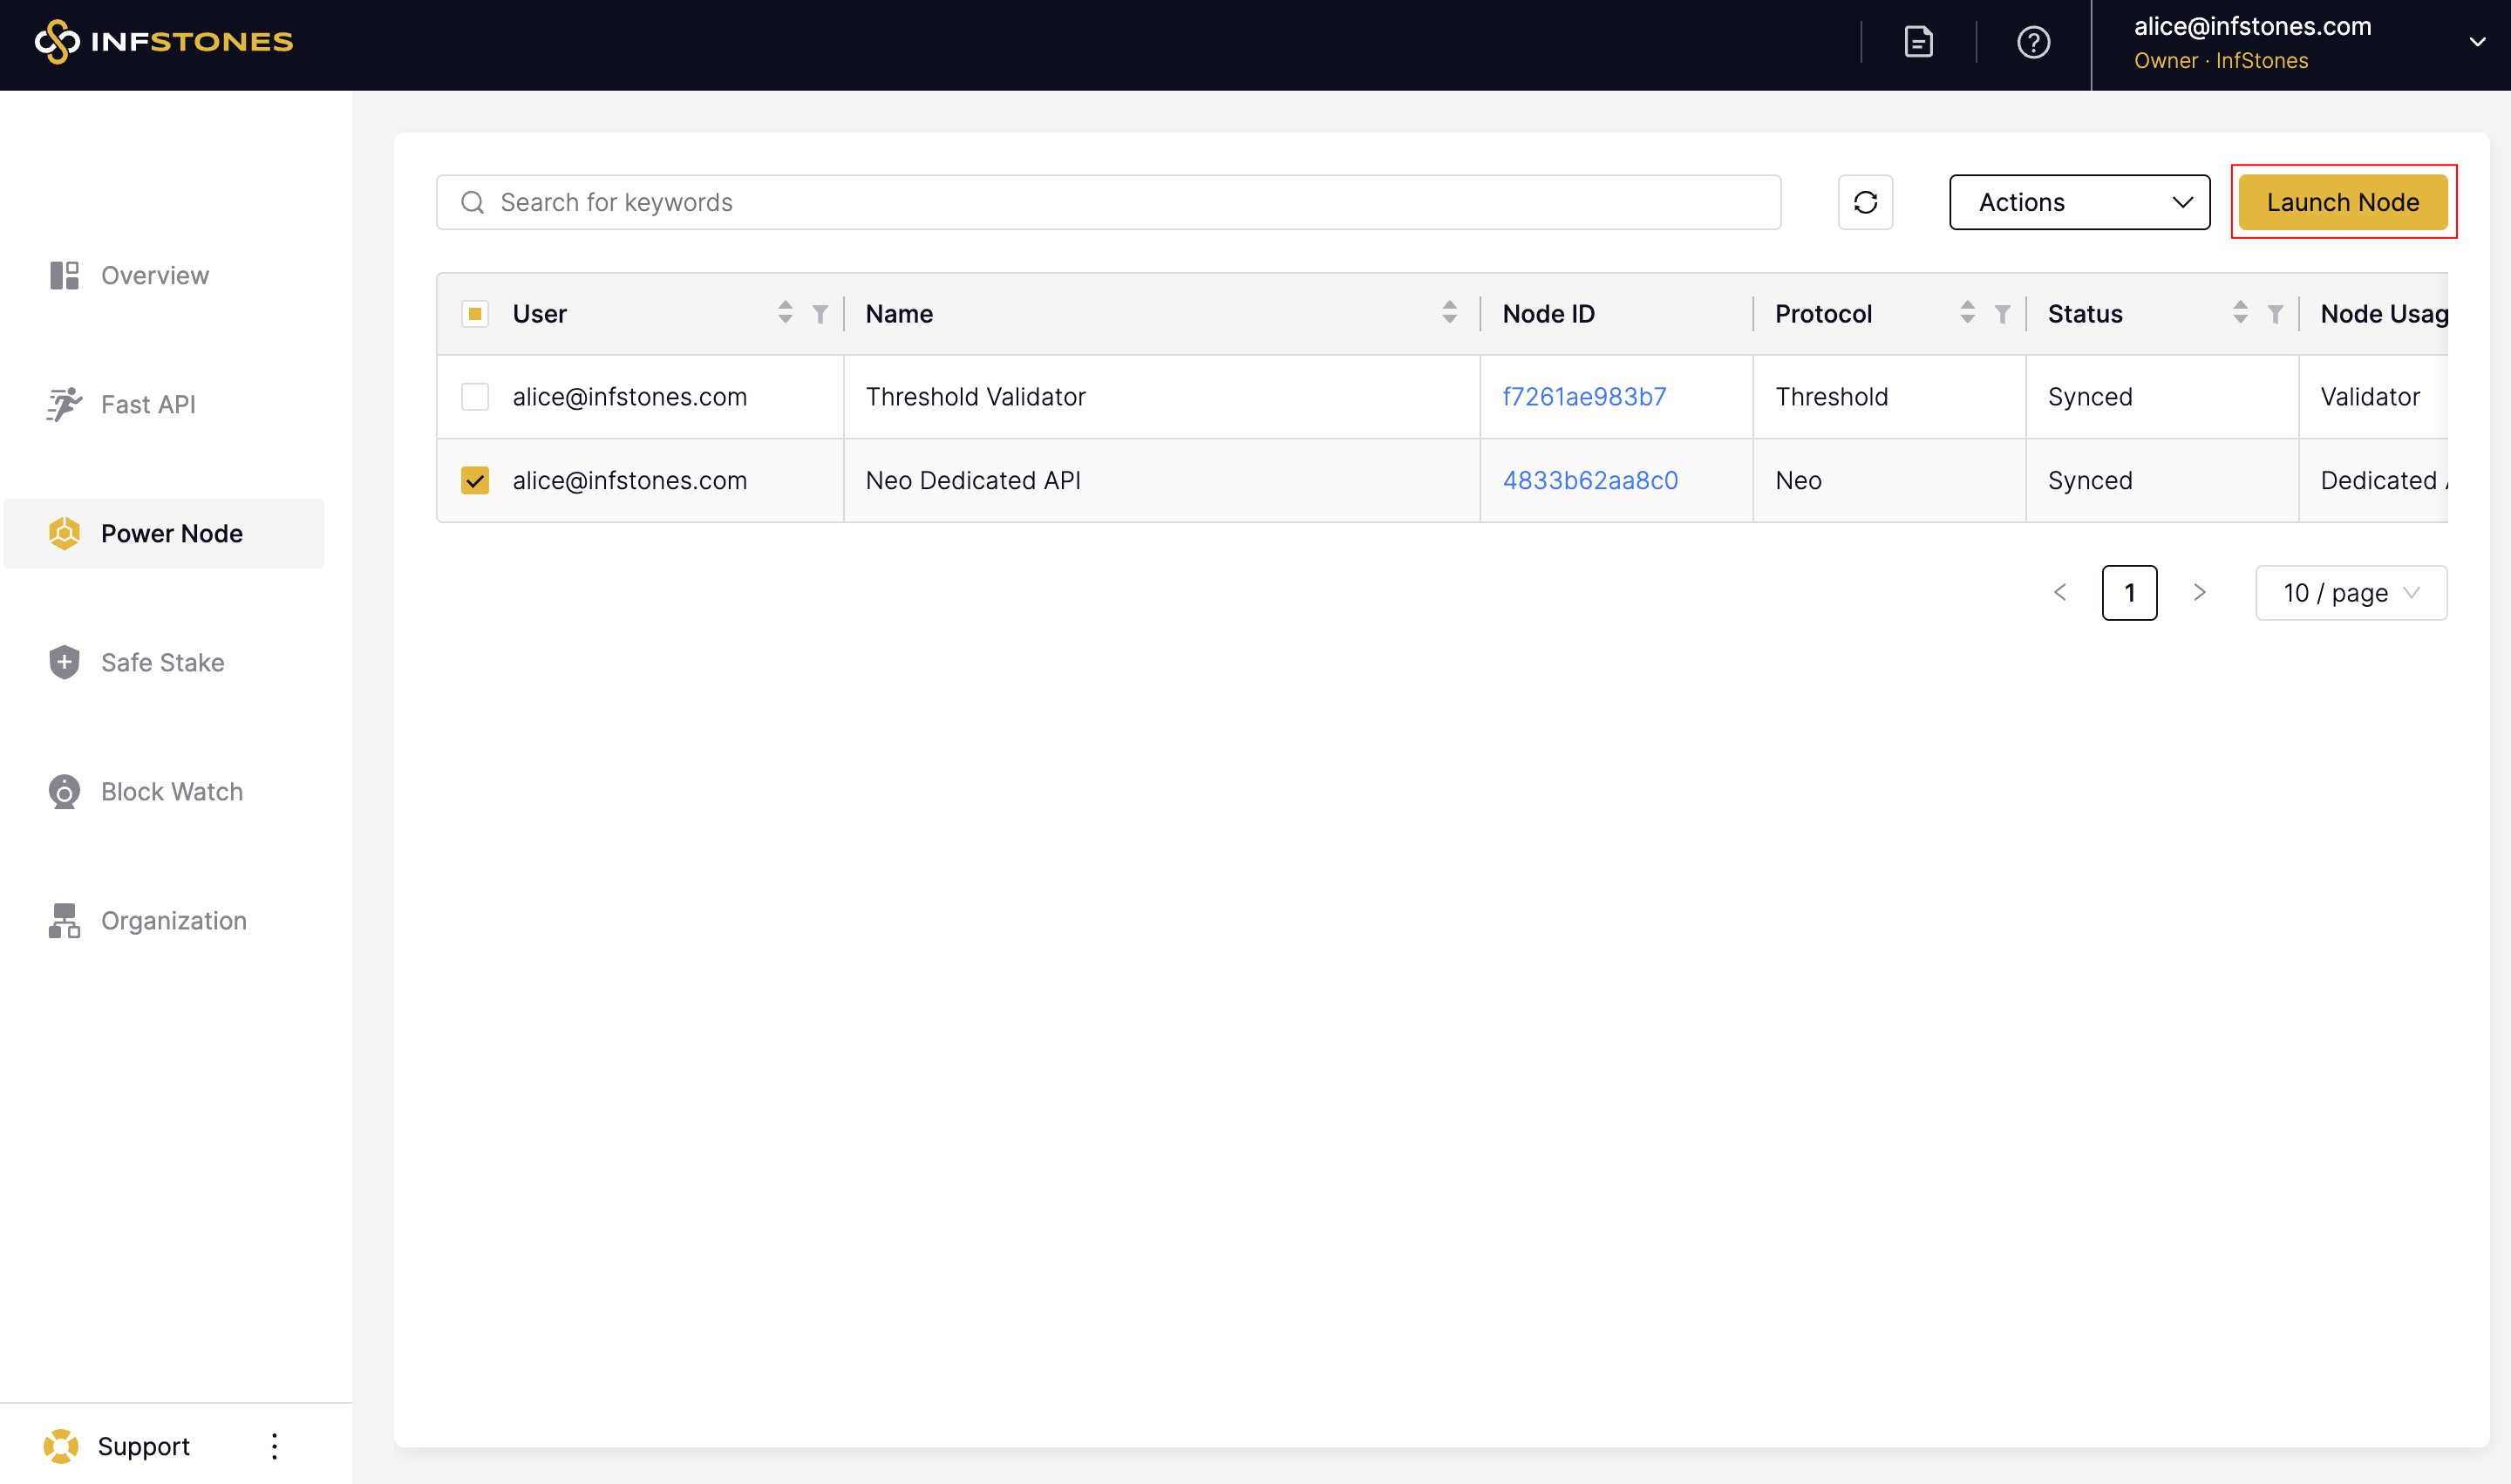
Go to Power Node page, click Create one Now button, and you will forward to the Launch Node page.
On the Launch Node page, you can select the protocol, select the network, select the node type, select the node usage, set IP address whitelist, set the node name, select the region of the node to be deployed, and configure the resources of the node. For the resource, you can either configure it by using the Recommended resource or the resource as you like. Finally, click the Launch button to complete.
2 Use Node
After launching a node, you can use the node for different purposes: 1) as a Dedicated API; and 2) as a validator node.
If you want to use the node for a Dedicated API, please click Actions -> Usage -> Use Node as Dedicated API. On this page, you can turn on the API button and use the endpoint to connect to the node. Learn more at Dedicated API Setup.
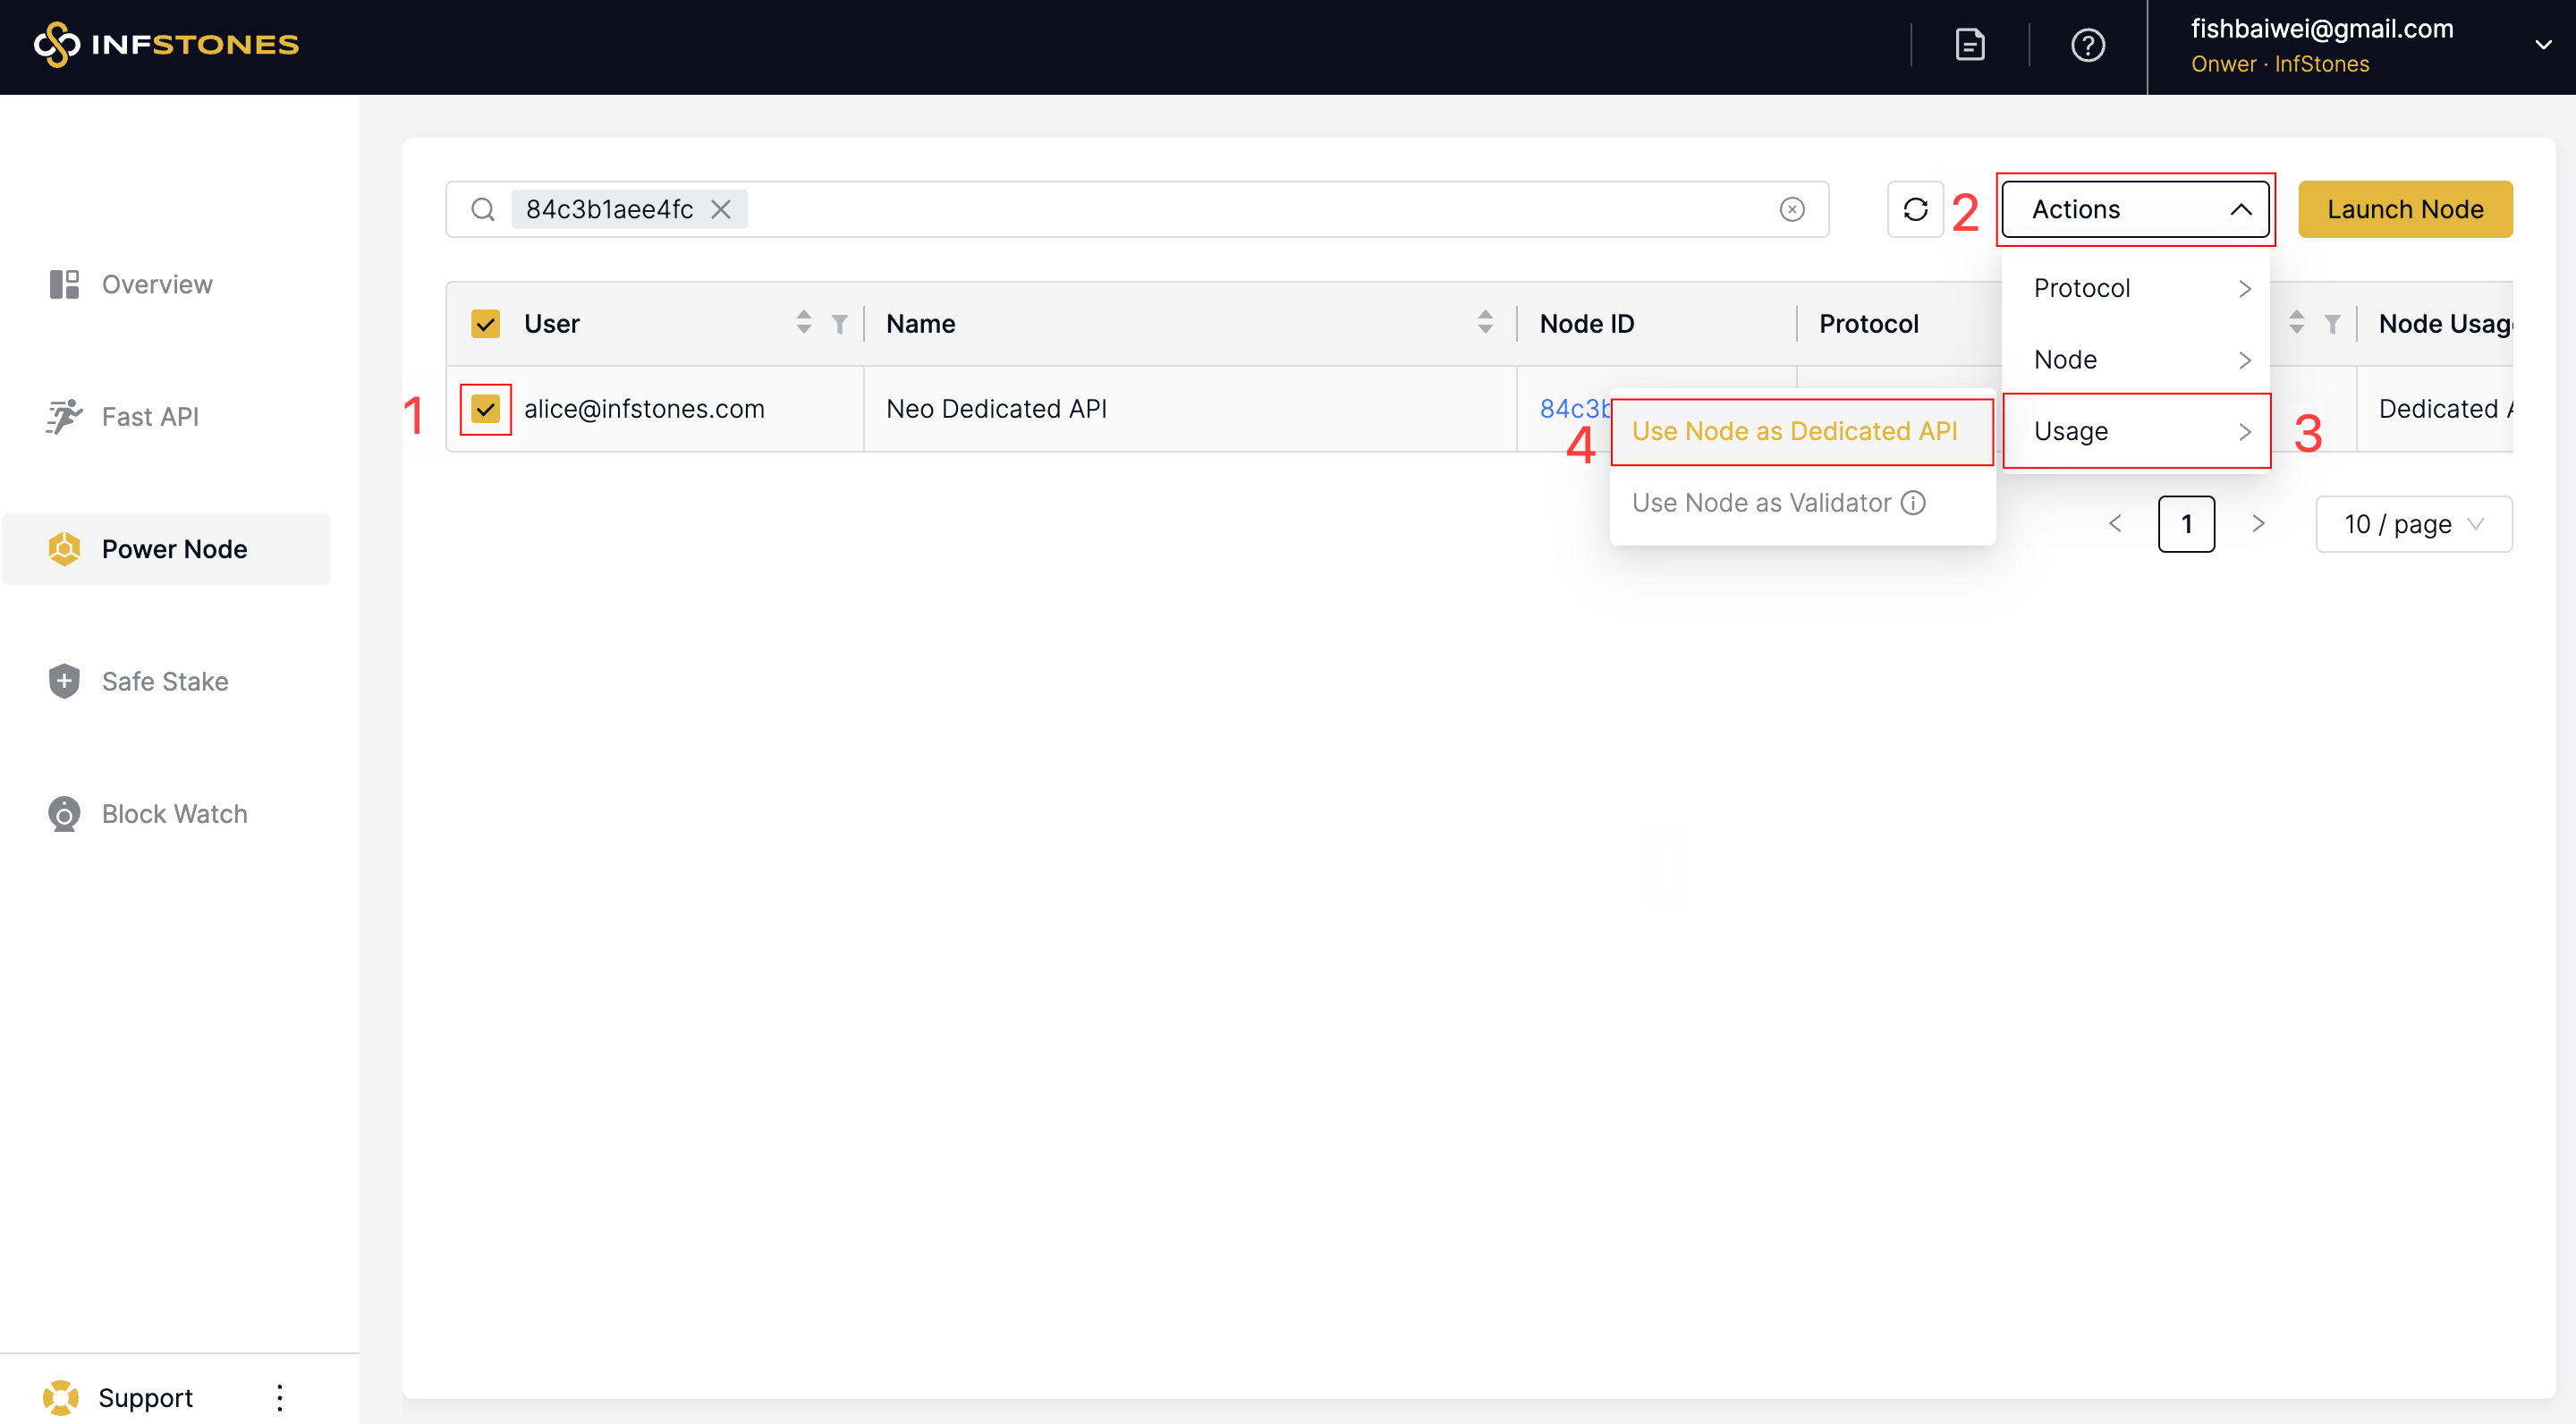
If you want to use the node as a Validator, please click Actions -> Usage -> Use Node as Validator. Learn more at Easy Validator Setup.

3 Supported Protocols
We are now supporting the node services on the following blockchain protocols.
- BNB Chain
- CORE
- Cosmos
- Dash
- Ethereum
- IoTeX
- Neo
- Oasis Network
- Persistence
- Polygon
- REI Network
- SatoshiChain
- Solana
- StarkNet
- Sui
- Tezos
- Theta
- Threshold
4 Next Steps
After you launch a blockchain node, you might want to try some of the following features:
- Learn how to use the node, see Node Usage.
- Learn how to manage the node, see Node Actions.
- Learn how to check the node status, see Node Status.
Updated 9 months ago